Table of contents
This post will introduce you to AWS Lambda Layers, what problems they solve and how you can use them.
The Problem
First of all, let's take a look at how lambda is handling dependencies and the problems with that.
Lambdas can have dependencies. These dependencies are normally included and packaged together with the lambda itself, or custom Docker containers are used. In this post, we ignore the idea of container runtimes, and simply talk about the default AWS Lambda runtime.
To add dependencies to your lambda function, you package them together. You need to install all libraries into a folder (e.g. node_modules or site-packages), add your code, and package everything into one .zip file. You upload this zip file to S3 and reference it in your actual lambda function.
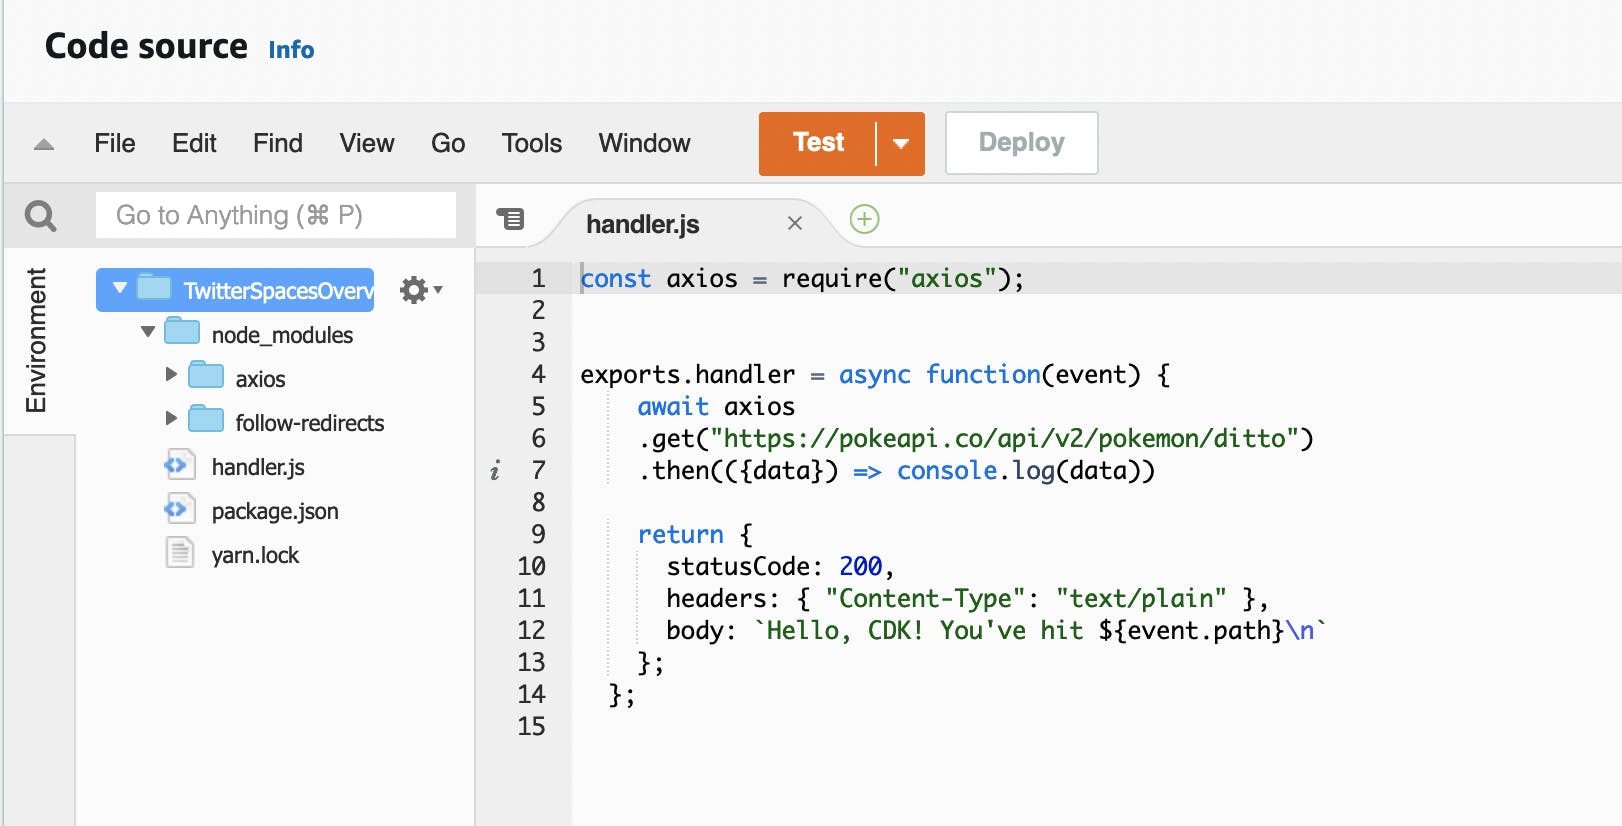
This increases the size of lambda functions. With lambdas under 3 Megabytes, we can even have a look at the lambda in the in-line editor, and have a quick look at the code, or even change something (not recommended). With increasing size, the deployment and upload times increase as well.
There are more scenarios where problems will occur:
Lambdas Share the Same Dependencies
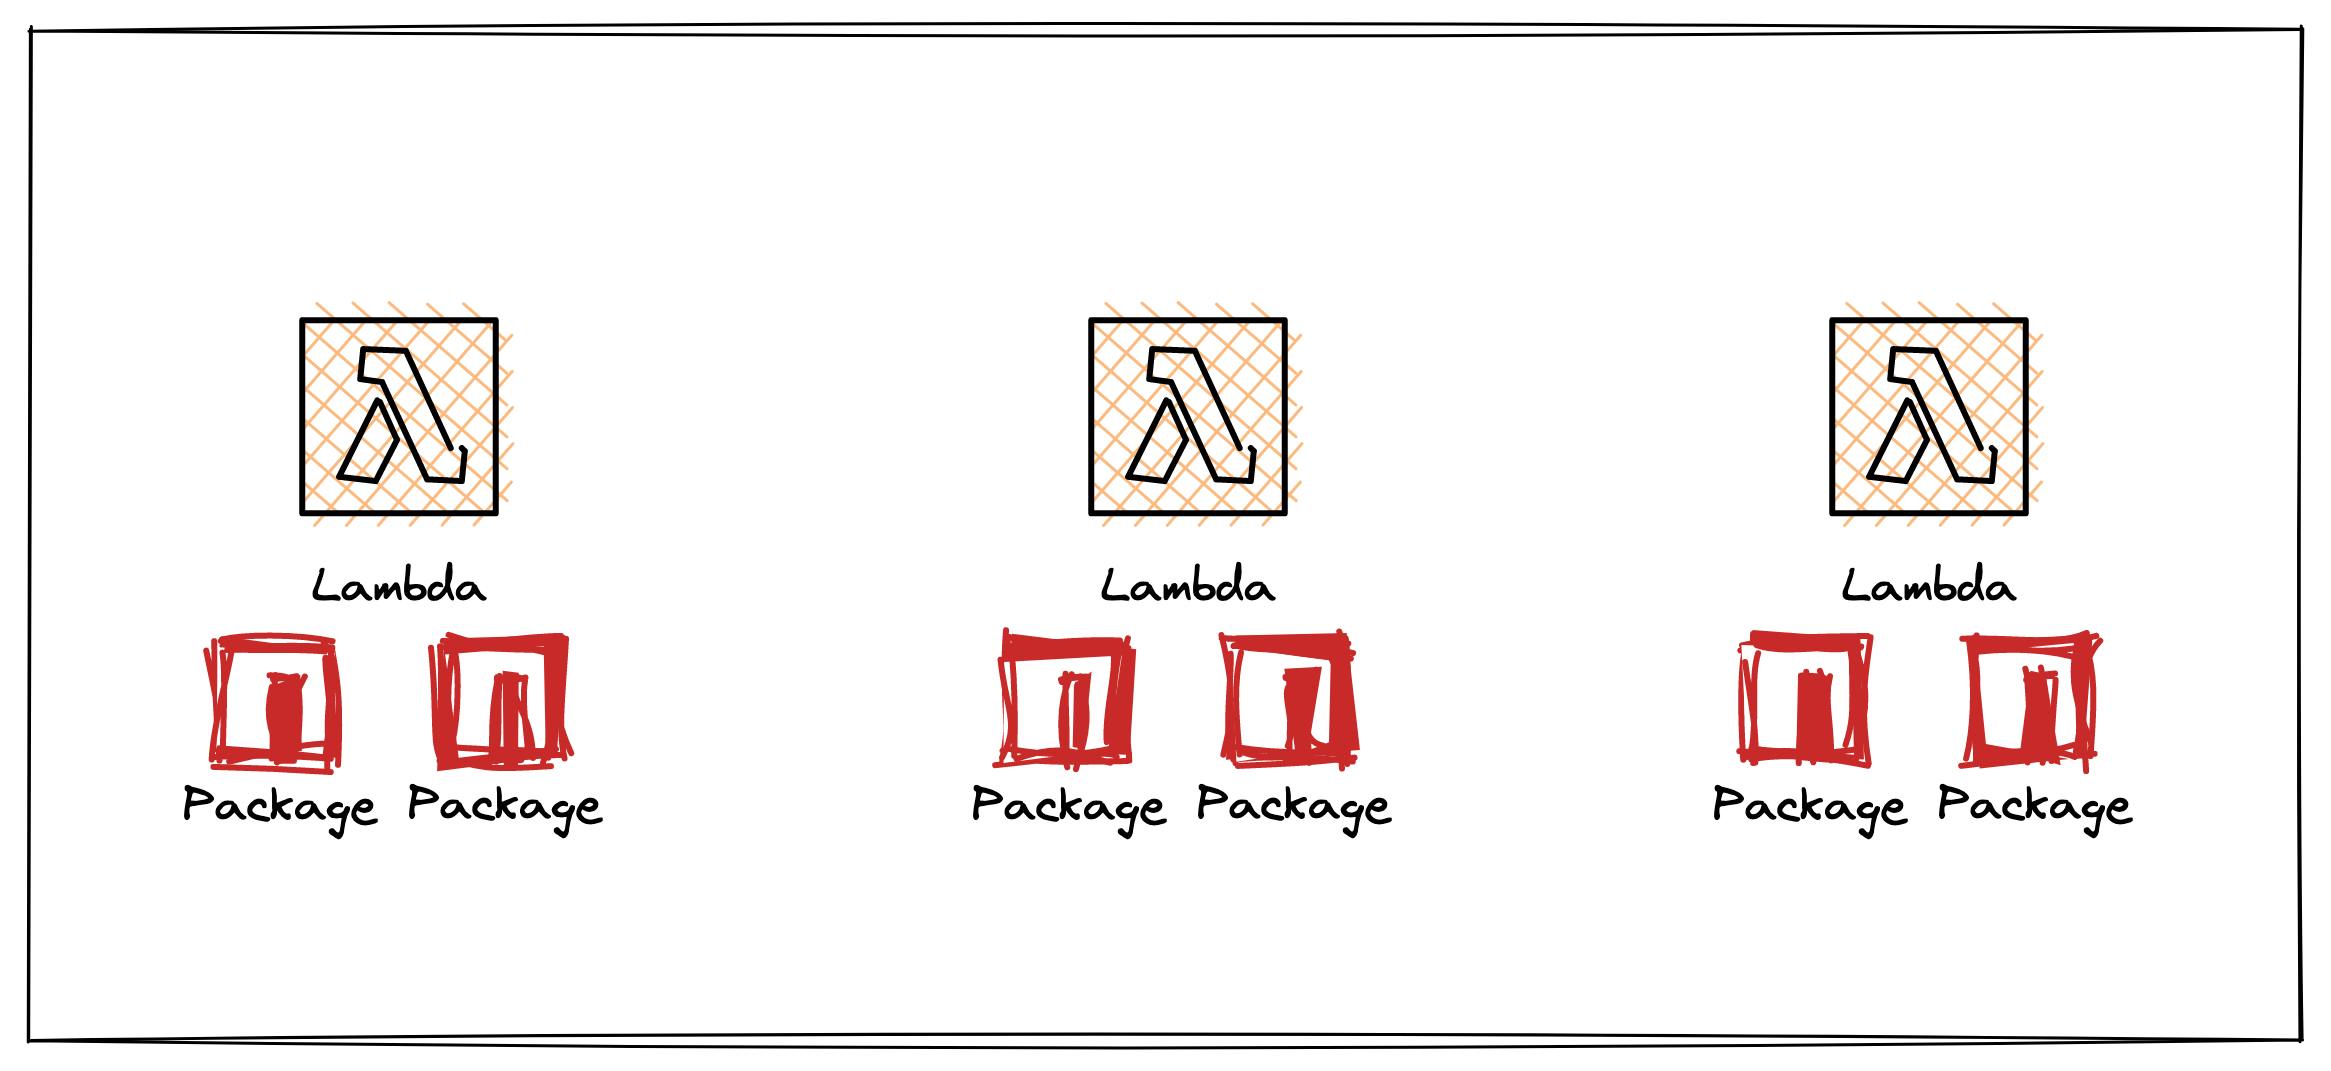
One problem occurs if we have many lambdas that share the same dependencies. In case we change a package, we need to update it everywhere and synchronize it. This can be quite time-consuming and error-prone.
Lambdas Share Code or Configs
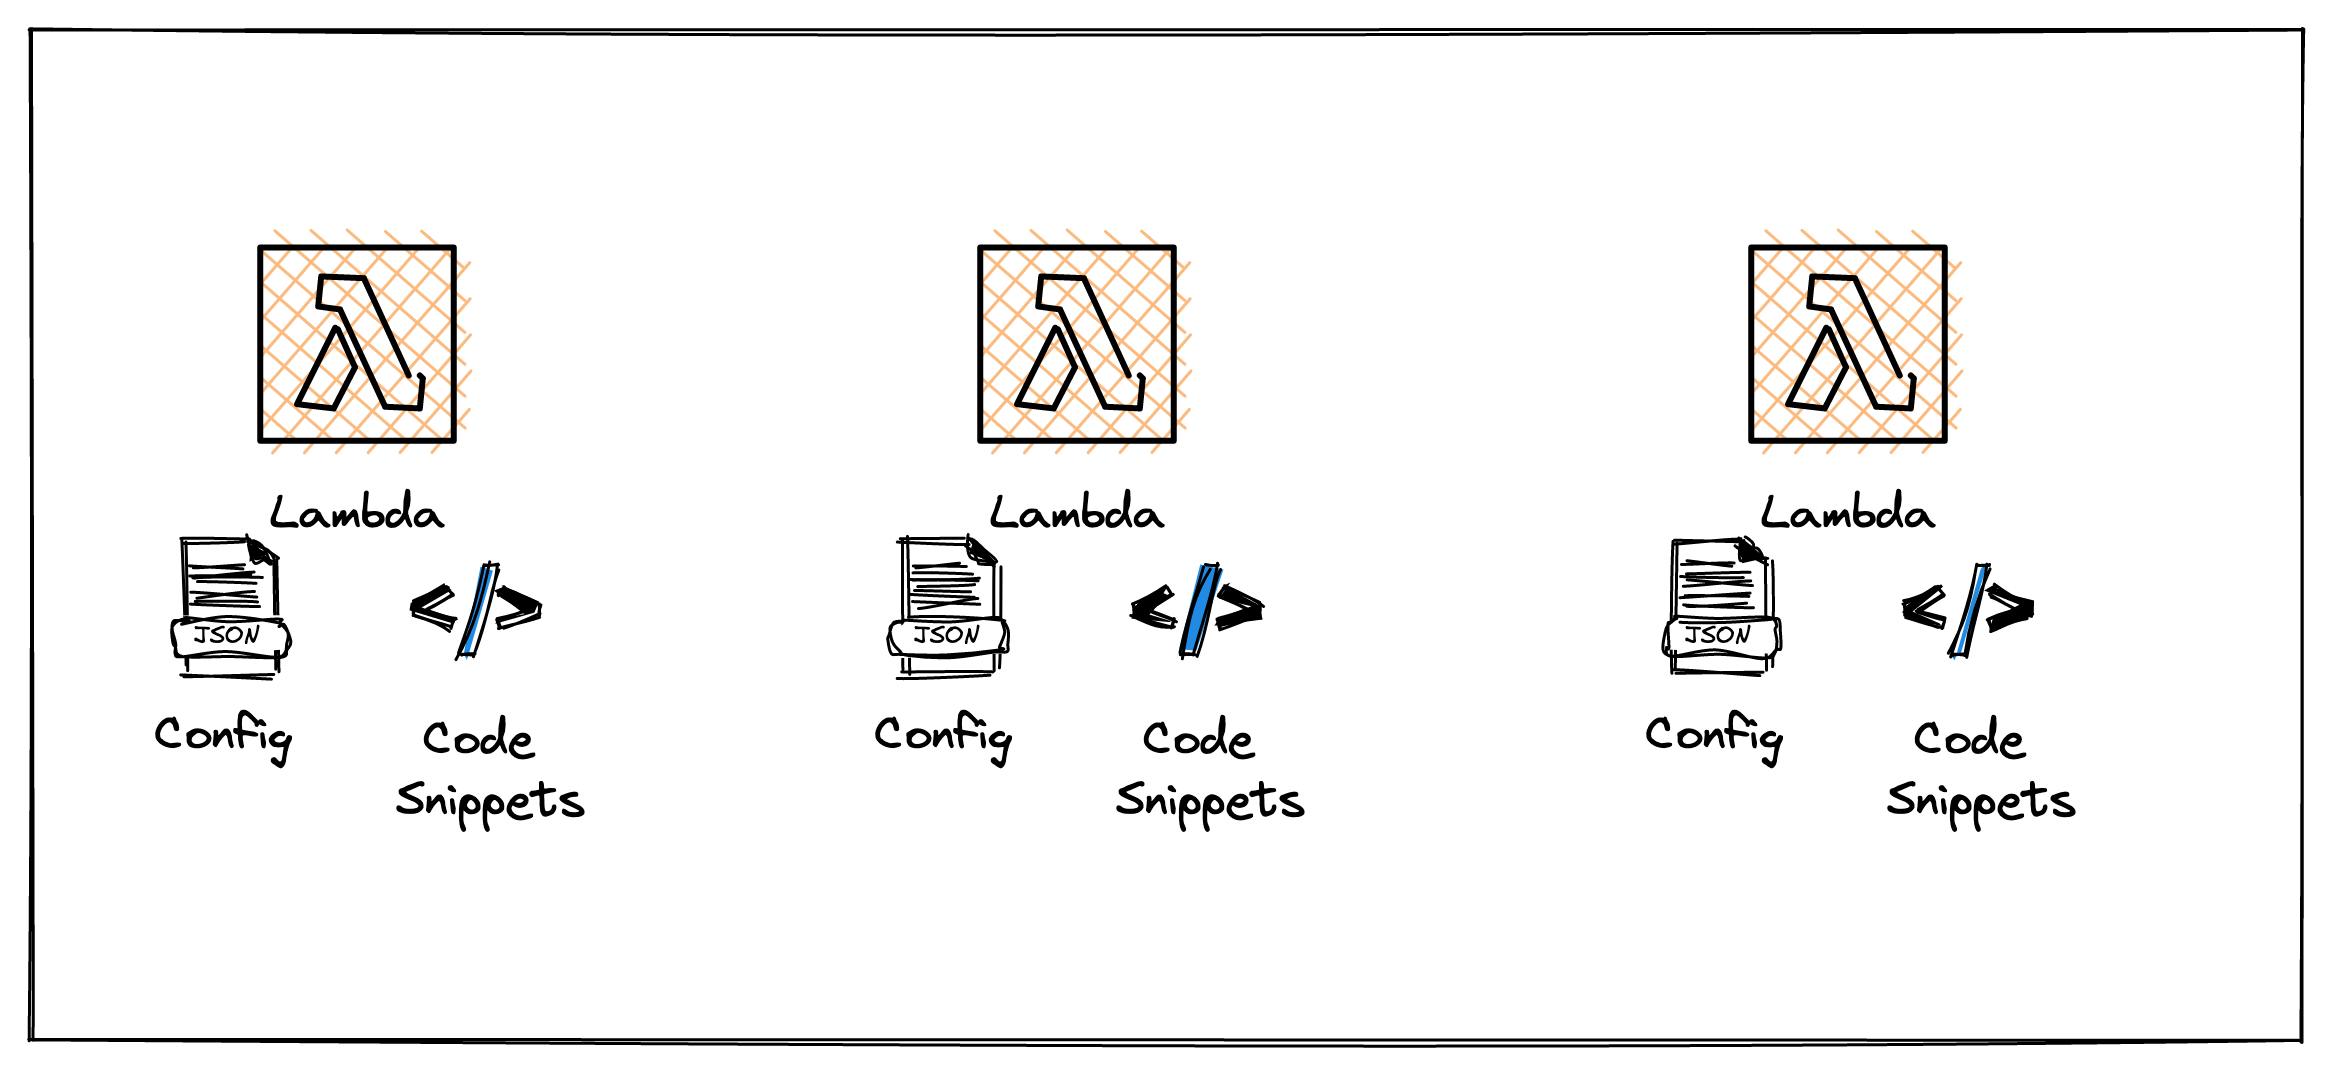
Similar to sharing dependencies, sharing the code of config files is very hard without layers. A typical example is a database model. You definitely want to share that without adding it everywhere or fetching it from some other data source. For that lambda, layers are really great.
Size of the lambda
With an increasing number of dependencies, the lambda size increases as well. You need to keep in mind that each deployment needs to package all dependencies, and your function code together into one zip file and upload this to S3. This can take a while if you add too many dependencies. We don't want long deployment times because we want to have fast feedback loops.
Separating External and Internal Code
For development purposes, it often makes sense to separate code that interacts with external APIs and code that is executing business logic. You could have all external code in one layer and change it flexibly. With that, you are able to change external libraries easily without touching each and every lambda function.
Lambda Layers
This introduces us to lambda layers. Lambda layers are basically lambda functions as well which can be mounted to several other lambda functions.
Lambda layers give us functionality for sharing dependencies, config files, or common code snippets with many lambda functions. We can reference this layer to many lambdas.
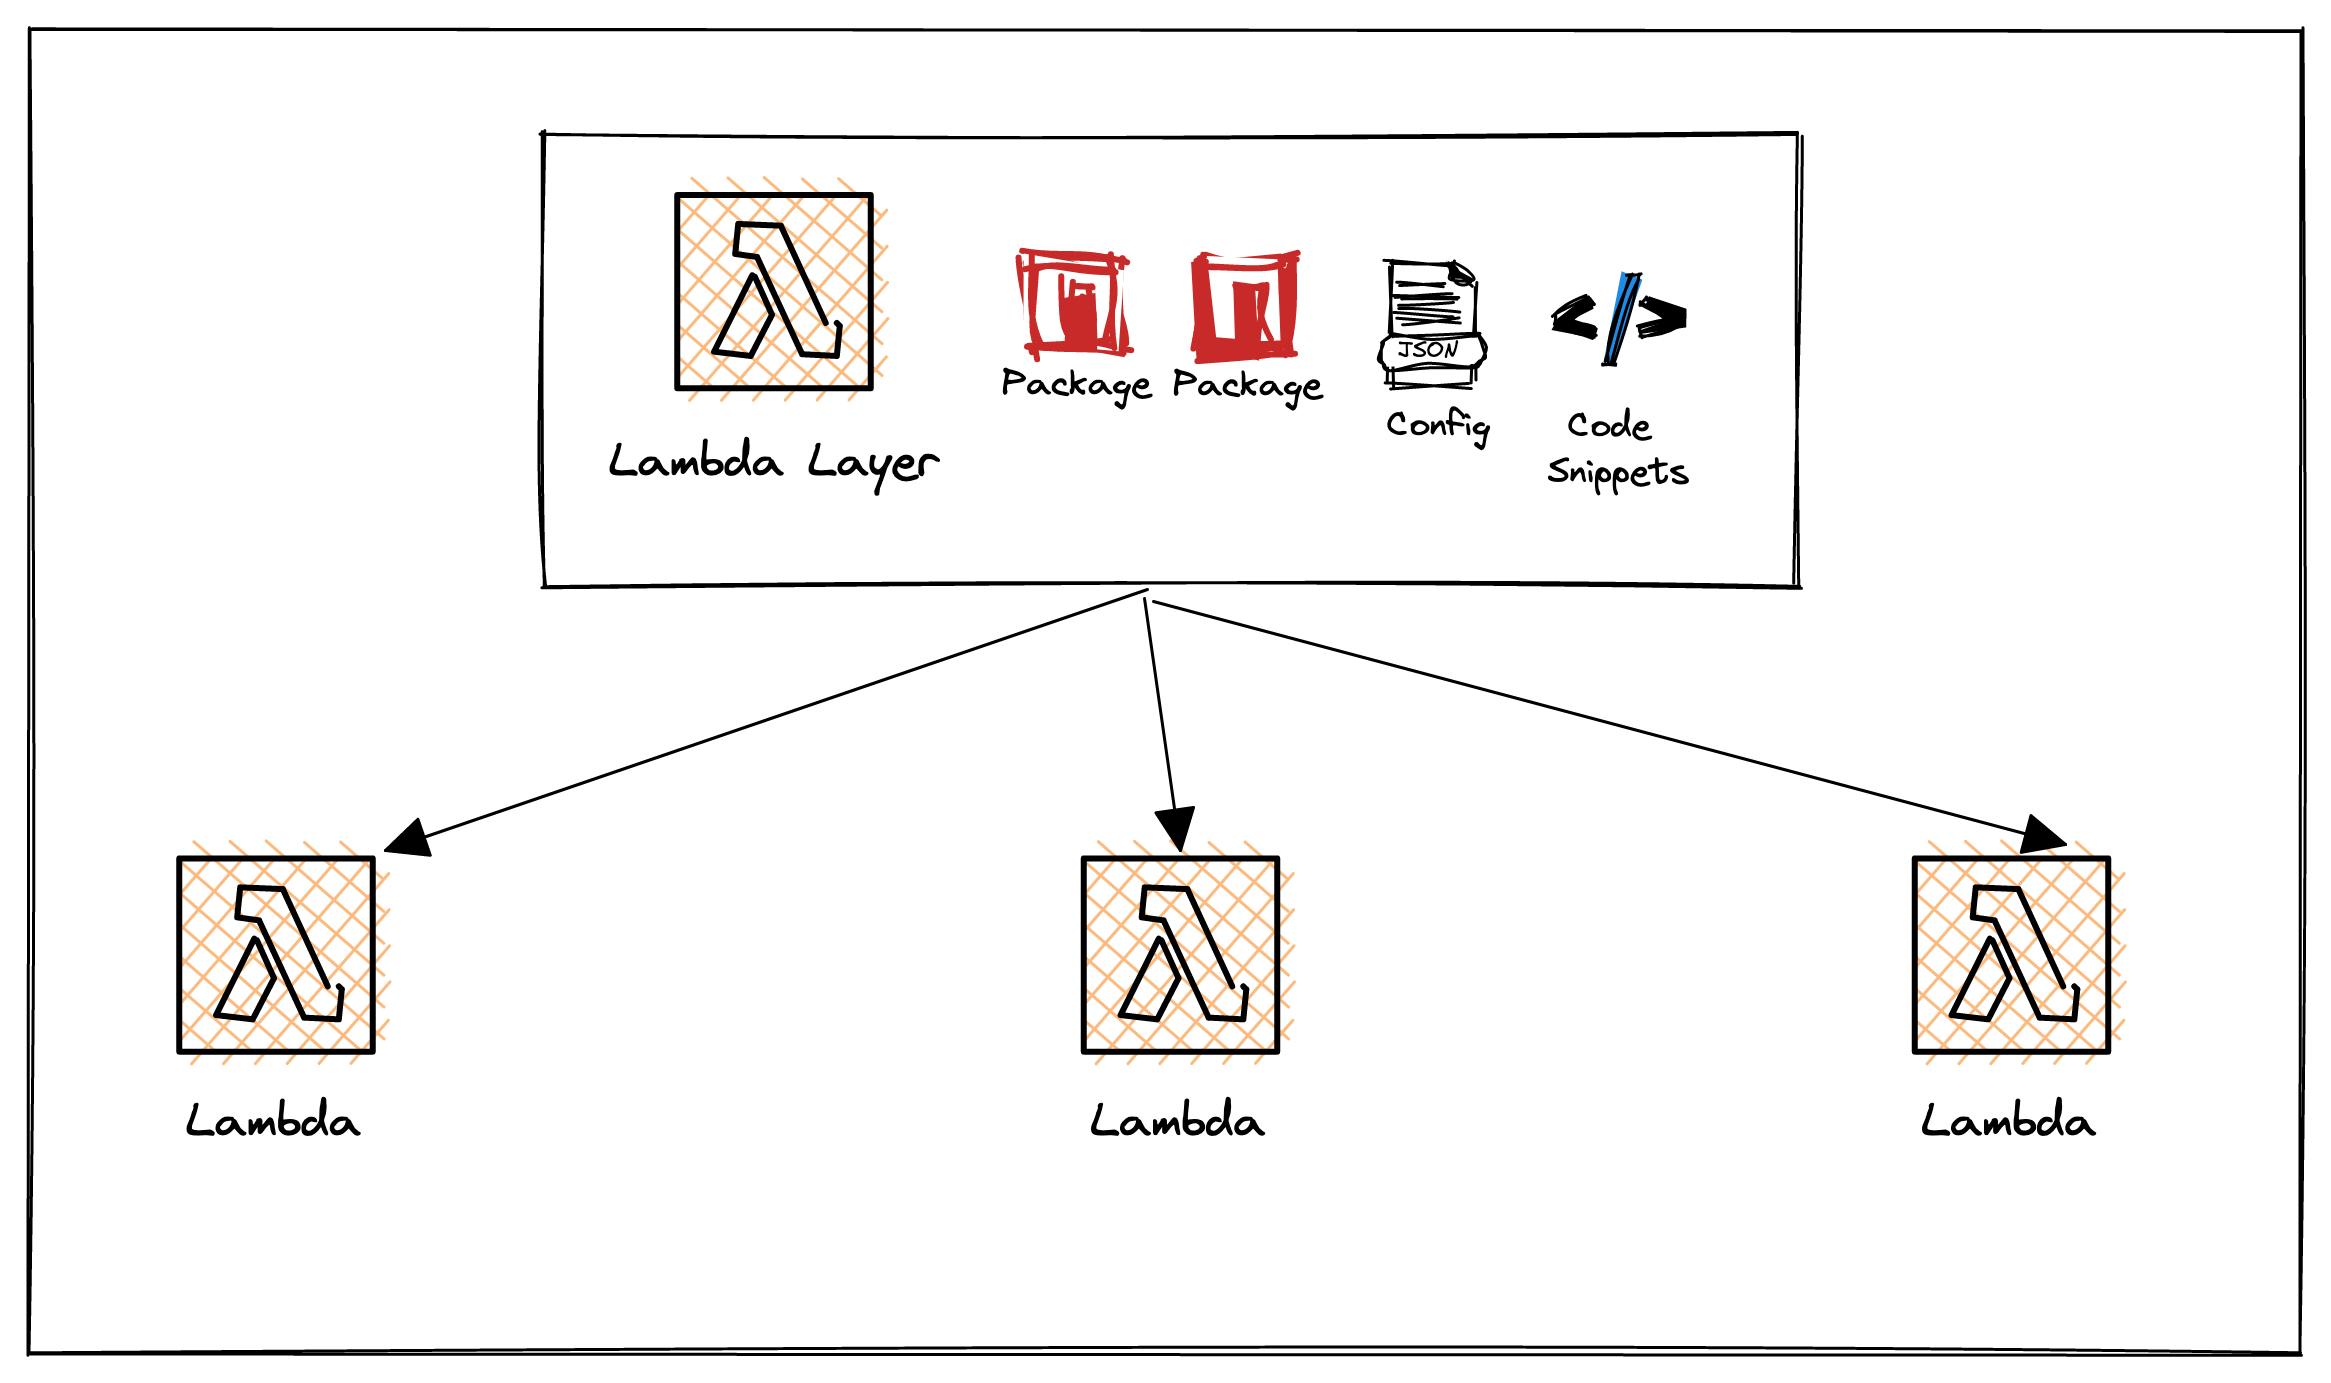
If you reference a lambda layer, it simply mounts the content of the layer into the lambda. For the lambda function, it looks exactly like you have packaged your whole lambda with the content of the layer as well.
The layer can consist of everything you want. For example:
- Config files: Share common
config.jsonfiles - Code snippets: DynamoDB models and snippets for accessing
- Libraries:
node_modulesorsite-packages
These layers will speed up your deployment and development times immensely.
To create lambda layers, you also need to zip all files into one archive and upload it to Amazon S3. It is the same procedure as with a normal lambda function. Your layer also needs to be compatible with the Amazon Linux runtime.
Paths for including libraries
To include libraries, you should stick to a certain path schema that you can import the dependencies without any additional hassle. This page gives an overview of all different paths you can use in layers without adding specific paths to your PATH environment variable.
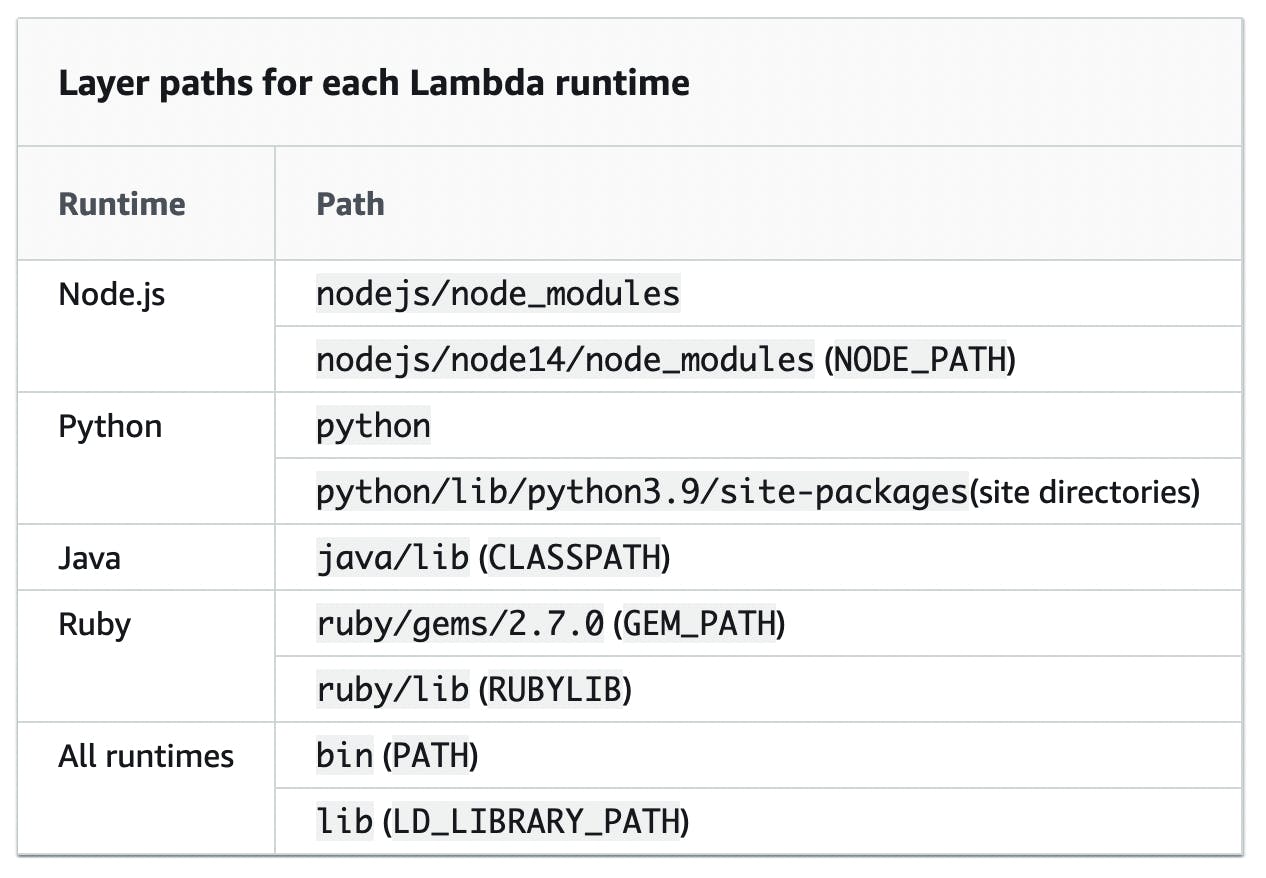
For example, on Node.js, you can simply put all your modules into nodejs/node_modules, then import them without adding anything to thePATH.
How to create a layer?
Let's create a lambda layer for Node.JS and see how that works. For example, let's share one .json file with some config strings and the lodash library.
Managed Console
Add dependencies and zip'em
You can create a layer directly in the managed console.
We create a new directory lambda-layer-node
mkdir lambda-layer-node
Now we initialize the project:
yarn init
We hit enter a couple of times and add a dependency:
yarn add lodash
Let's also create a sample .json config file.
echo '{"env":"development","secretString":"123"}' >> config.json
Now our file structure should look like that:
.
├── config.json
├── node_modules
├── package.json
└── yarn.lock
We need to stick to a certain path like mentioned above and here we put all node_modules in the directory nodejs.
mkdir nodejs
mv node_modules nodejs
We now just need to zip these files into one archive and our layer is done.
zip -r layer.zip *
With frameworks like Amplify, Serverless, Terraform, or CDK it is way easier and automated.
Add the Layer
Now we will add the actual layer in AWS.
Go to your console -> lambda and head to layers. Here you can click on Create Layer.
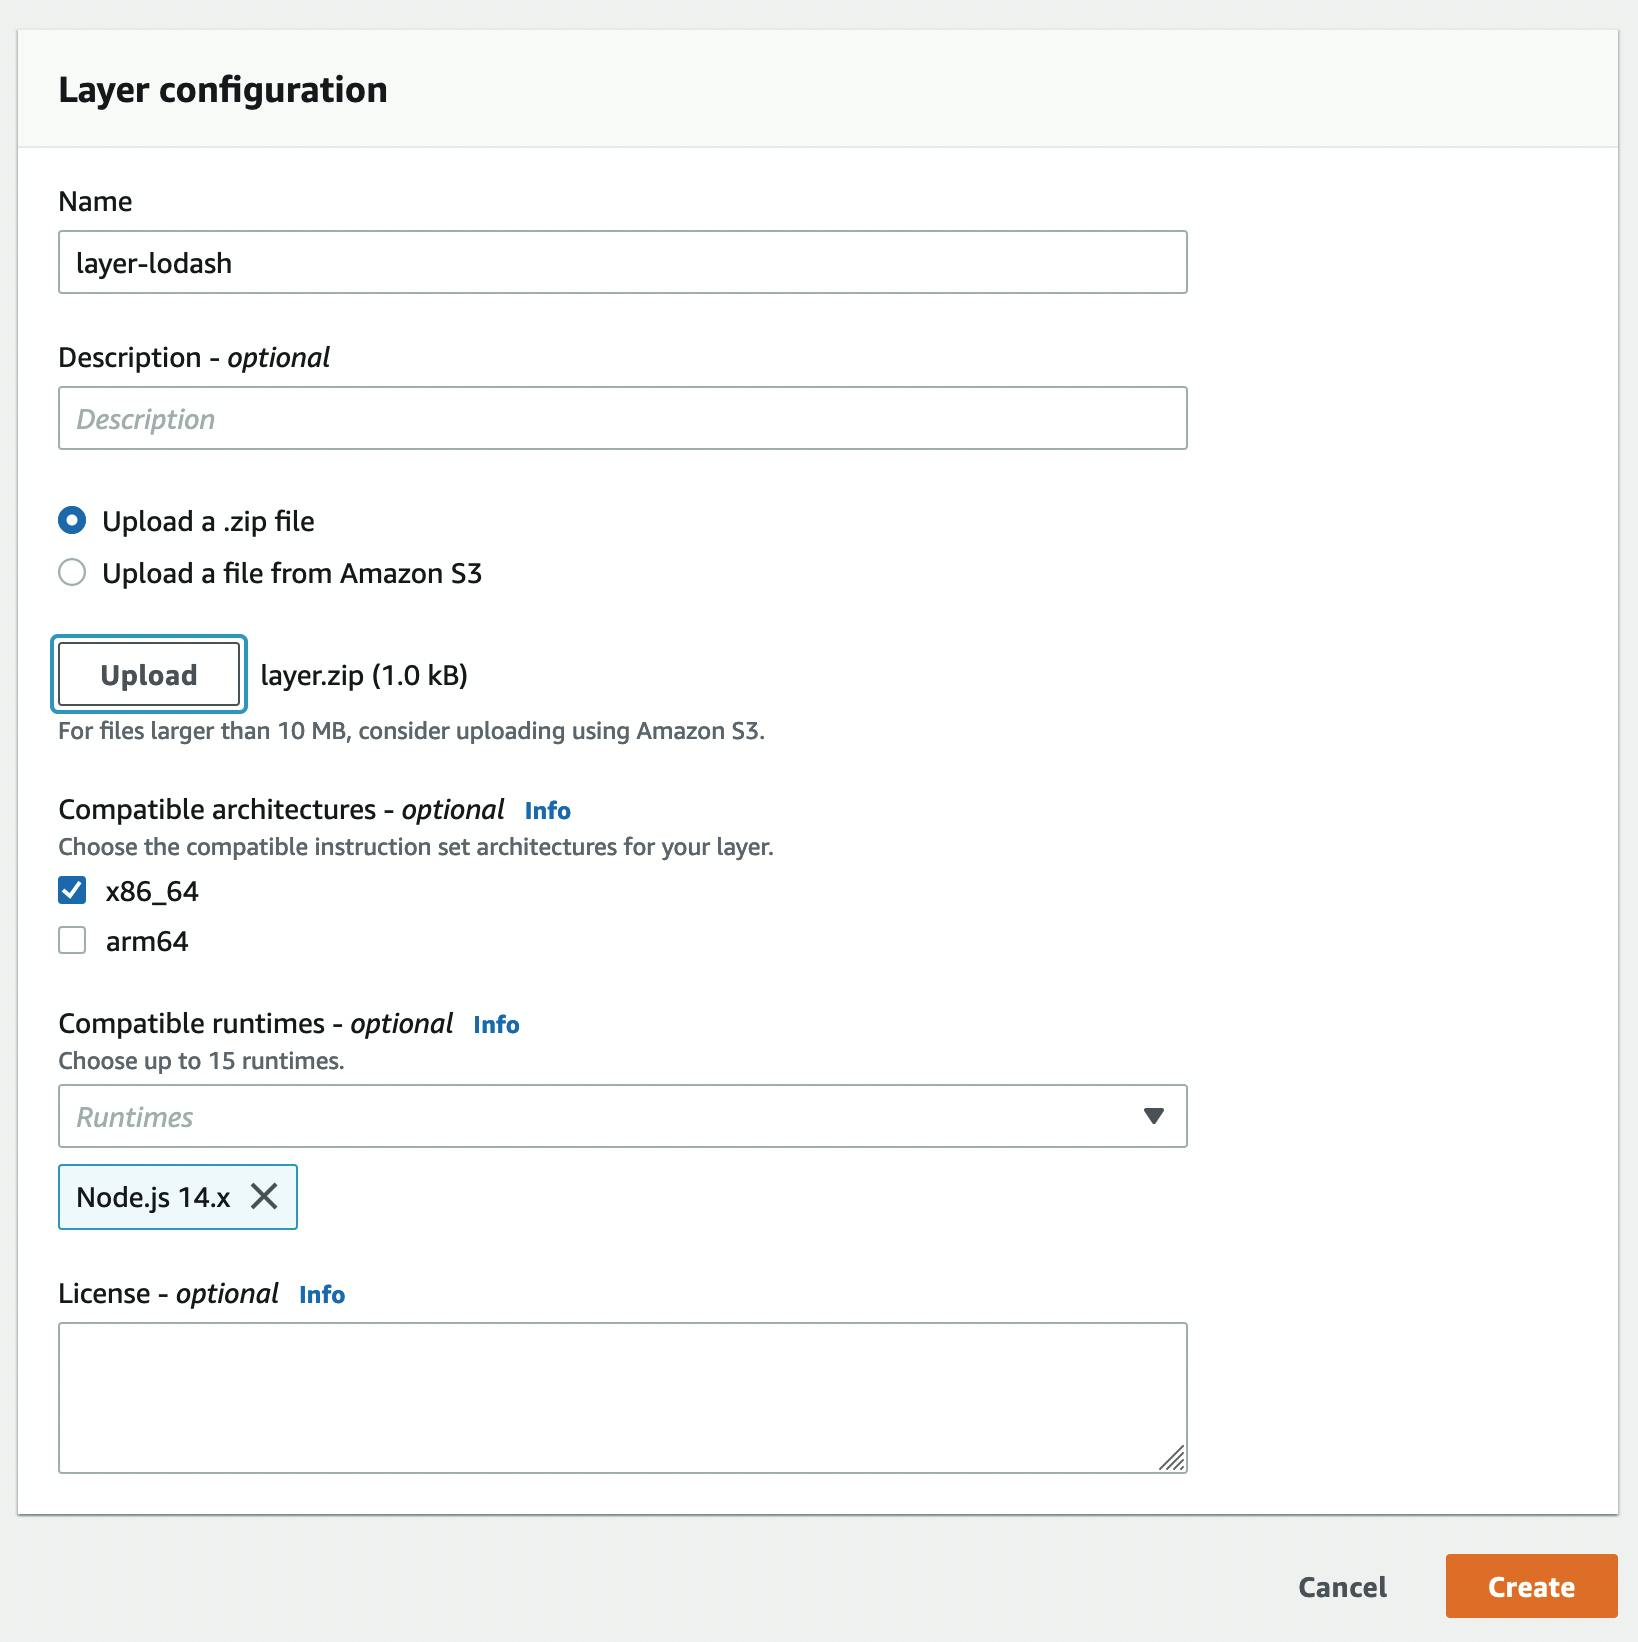
You'll see a form where you can enter a name, description, path to a zip file, architecture, and runtime. After hitting Create your lambda layer is created and can now be used.
Mounting the Layer
You can mount the layer either in a framework or the CLI by passing the ARN or by choosing it in the Lambda console. Let's choose it in the Lambda console.
Go to your lambda function and scroll right to the bottom.

There you can see Layers. Click on Add a Layer, click on Custom Layers, and you should be able to see your layer in the dropdown menu.
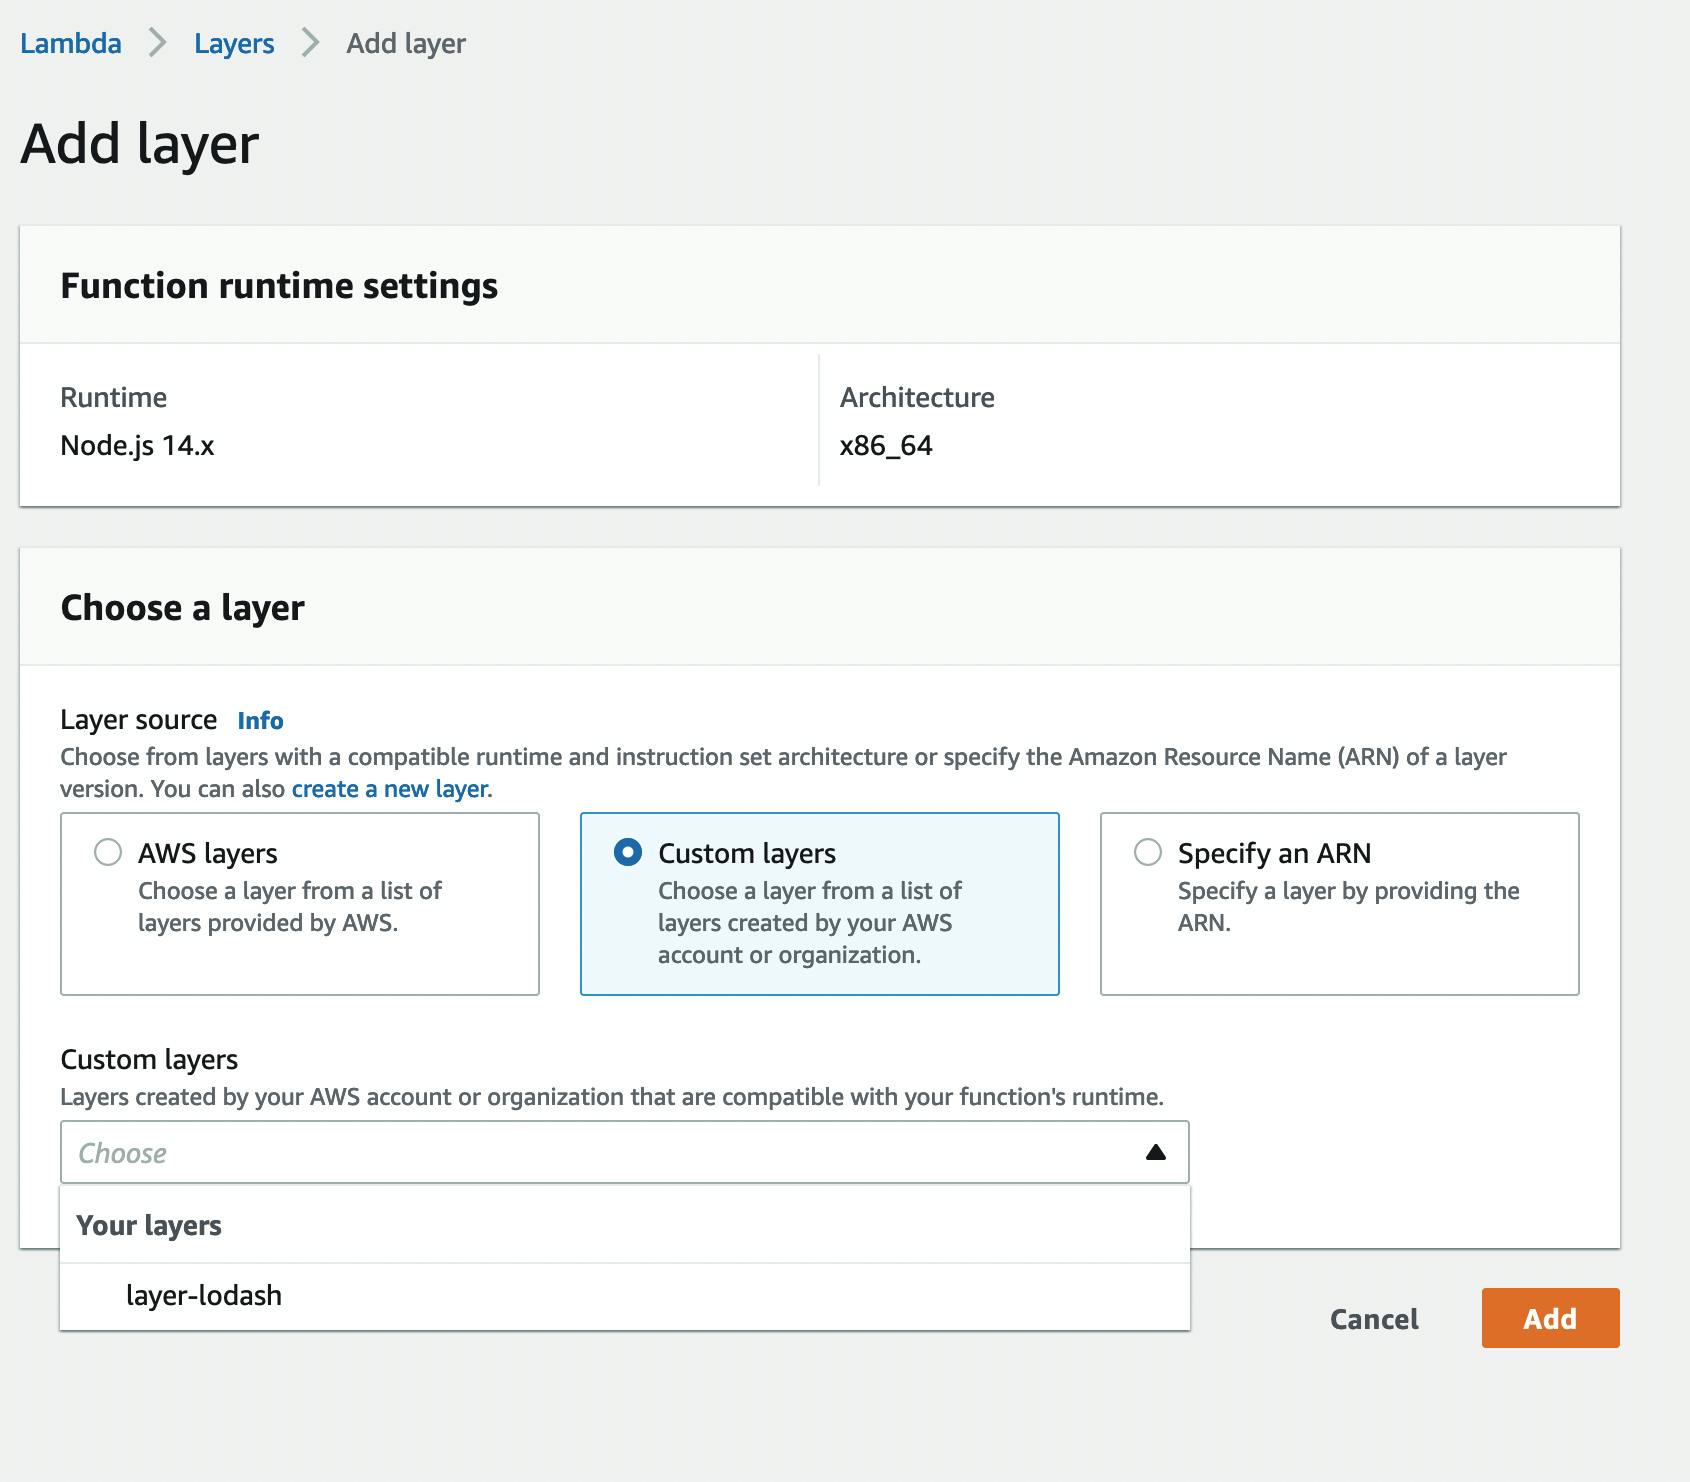
You also need to specify a version and then you are good to go.
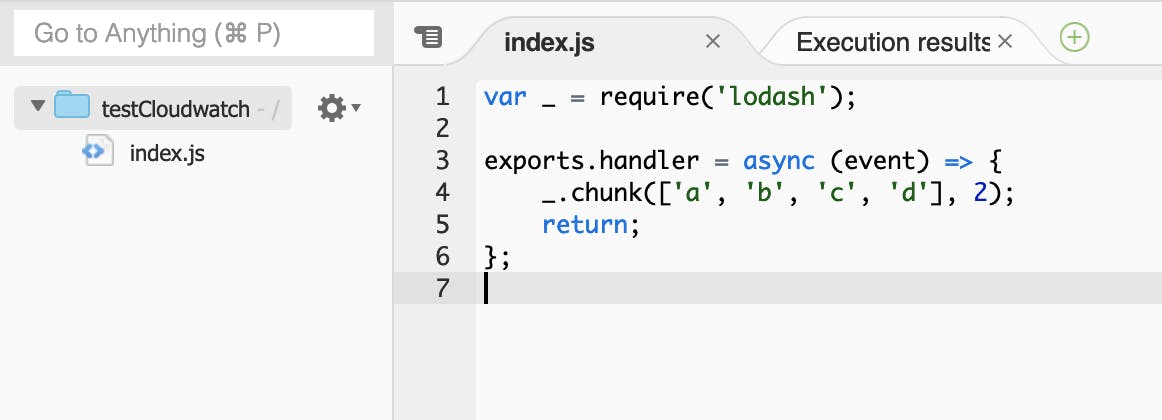
Now we can simply import lodash and use it in our Lambda function:
var _ = require('lodash');

exports.handler = async (event) => {
    _.chunk(['a', 'b', 'c', 'd'], 2);
    return;
};
This code will be executed without any dependencies directly in the lambda function.
Summary
In Summary, AWS Lambda Layers helps us with sharing dependencies, separating our code logic, and sharing code. My suggestion is to not try to separate everything from the beginning. Rather, build your application, see how it evolves, and then start optimizing it by putting shared resources into Layers.
If you want to learn more about AWS and building serverless products with AWS make sure to follow me on Twitter and this Blog on Hashnode 🙂

