


I am currently building ServerlessQ on the side. It is a hosted message queue service for Vercel users to build proper asynchronous systems.
This post gives an update on the current progress. I'll introduce a first glance at the dashboard. The dashboard is the main interaction point with the production.
The UI is far from finished but I think you get a good idea of the product.
What is the Dashboard?
The dashboard will be available under the domain: app.serverlessq.com
It is the main interaction point with the product. You can do the following things:
Creating a Queue
First of all, you can create a queue. After creating a queue you'll get an URL to which to send your requests to. All requests sent to this queue will be forwarded to your defined target in your request.
Overview of your messages
The dashboard also gives you an overview of your sent requests and their responses.
The goal is to give users the ability for a nice overview of all requests and their properties like status, headers, bodies, and retries.
Sending Messages
It is also possible to send messages directly from the UI. With that, it is easy to get started and understand the product without leaving the system. In a productive setting, messages won't be sent from the UI of course and code will be used. But to test it out it is easier to mock the send message functionality from the UI.
These are the main use cases that are already working. Let's have a look at them in the prototype.
The Prototype
Let's have a look at the prototype dashboard.
Create a Queue
First, let's create a queue.
It is a simple form with the attribute name. When you click on Create Queue several things happen. I showed them in detail in my first blog postof this series.
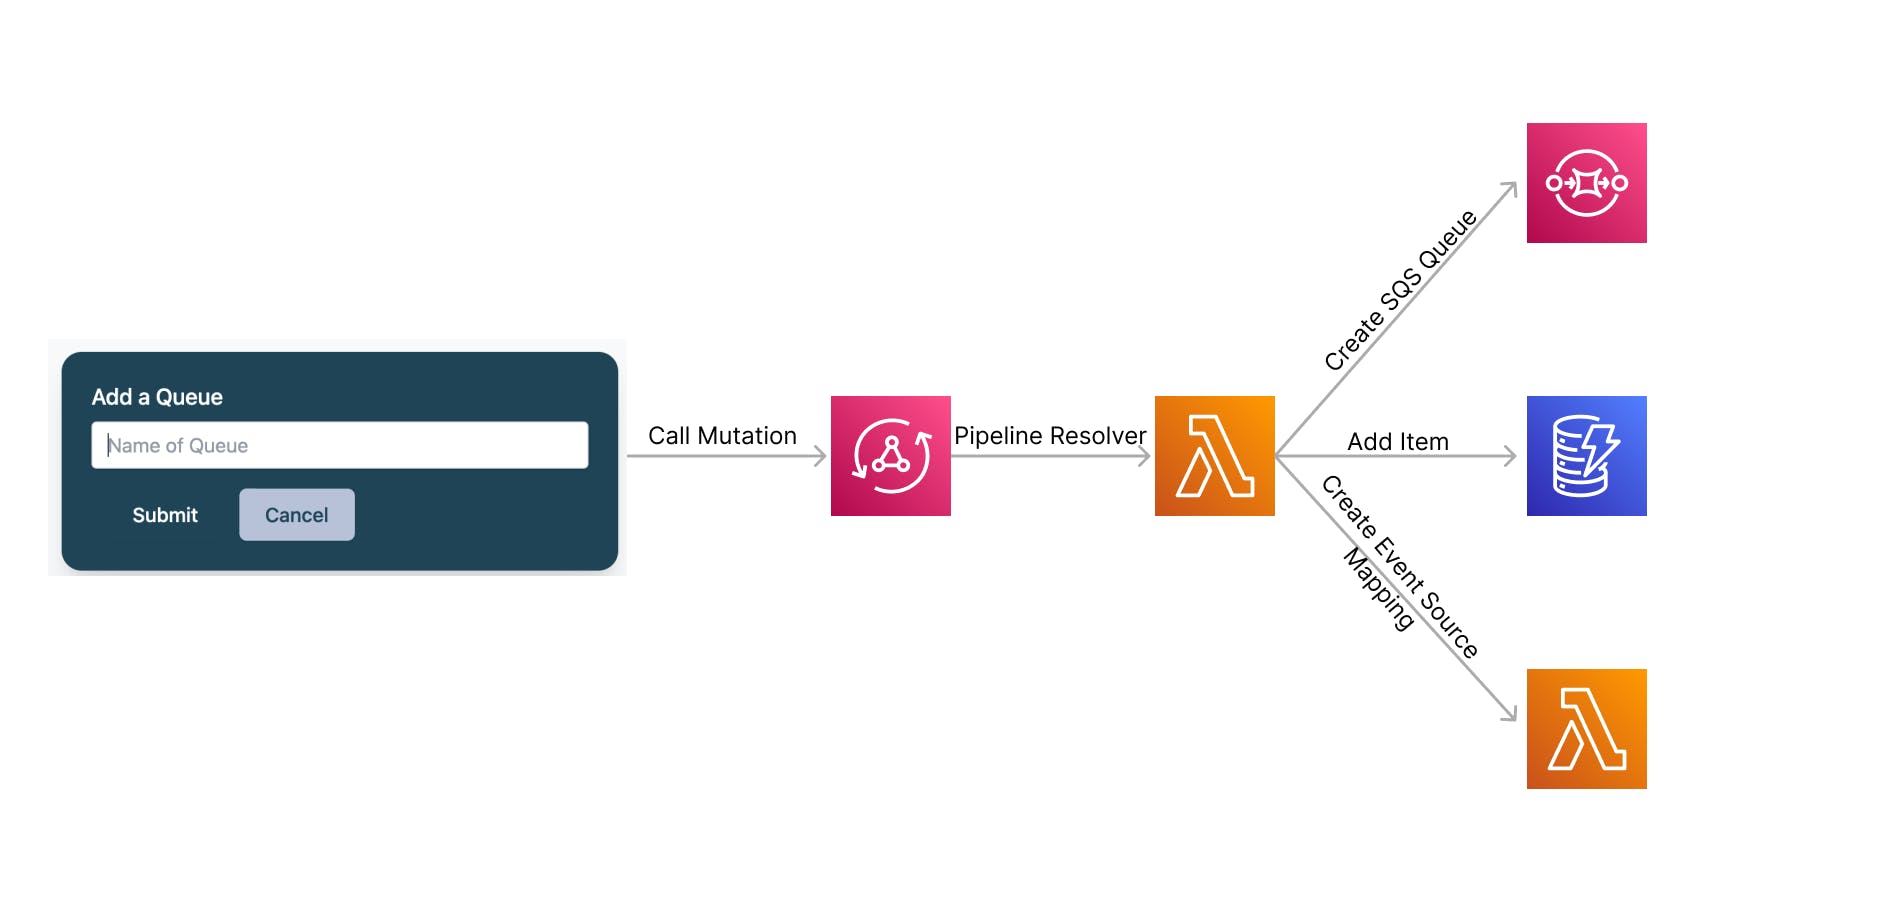
- AppSync Mutation will be called
- Mutation calls a pipeline resolver (lambda function)
- SQS Queue with customized default parameter will be created
EventSourceMappingwill be created and attached to a lambda function which executes the requests- An item will be added to the DynamoDB table
queues
That's it for creating a queue.
Queue List
Next, we have a list of queues. For now, we have some simple cards which show the name of the queue and the URL to your request that needs to be sent.
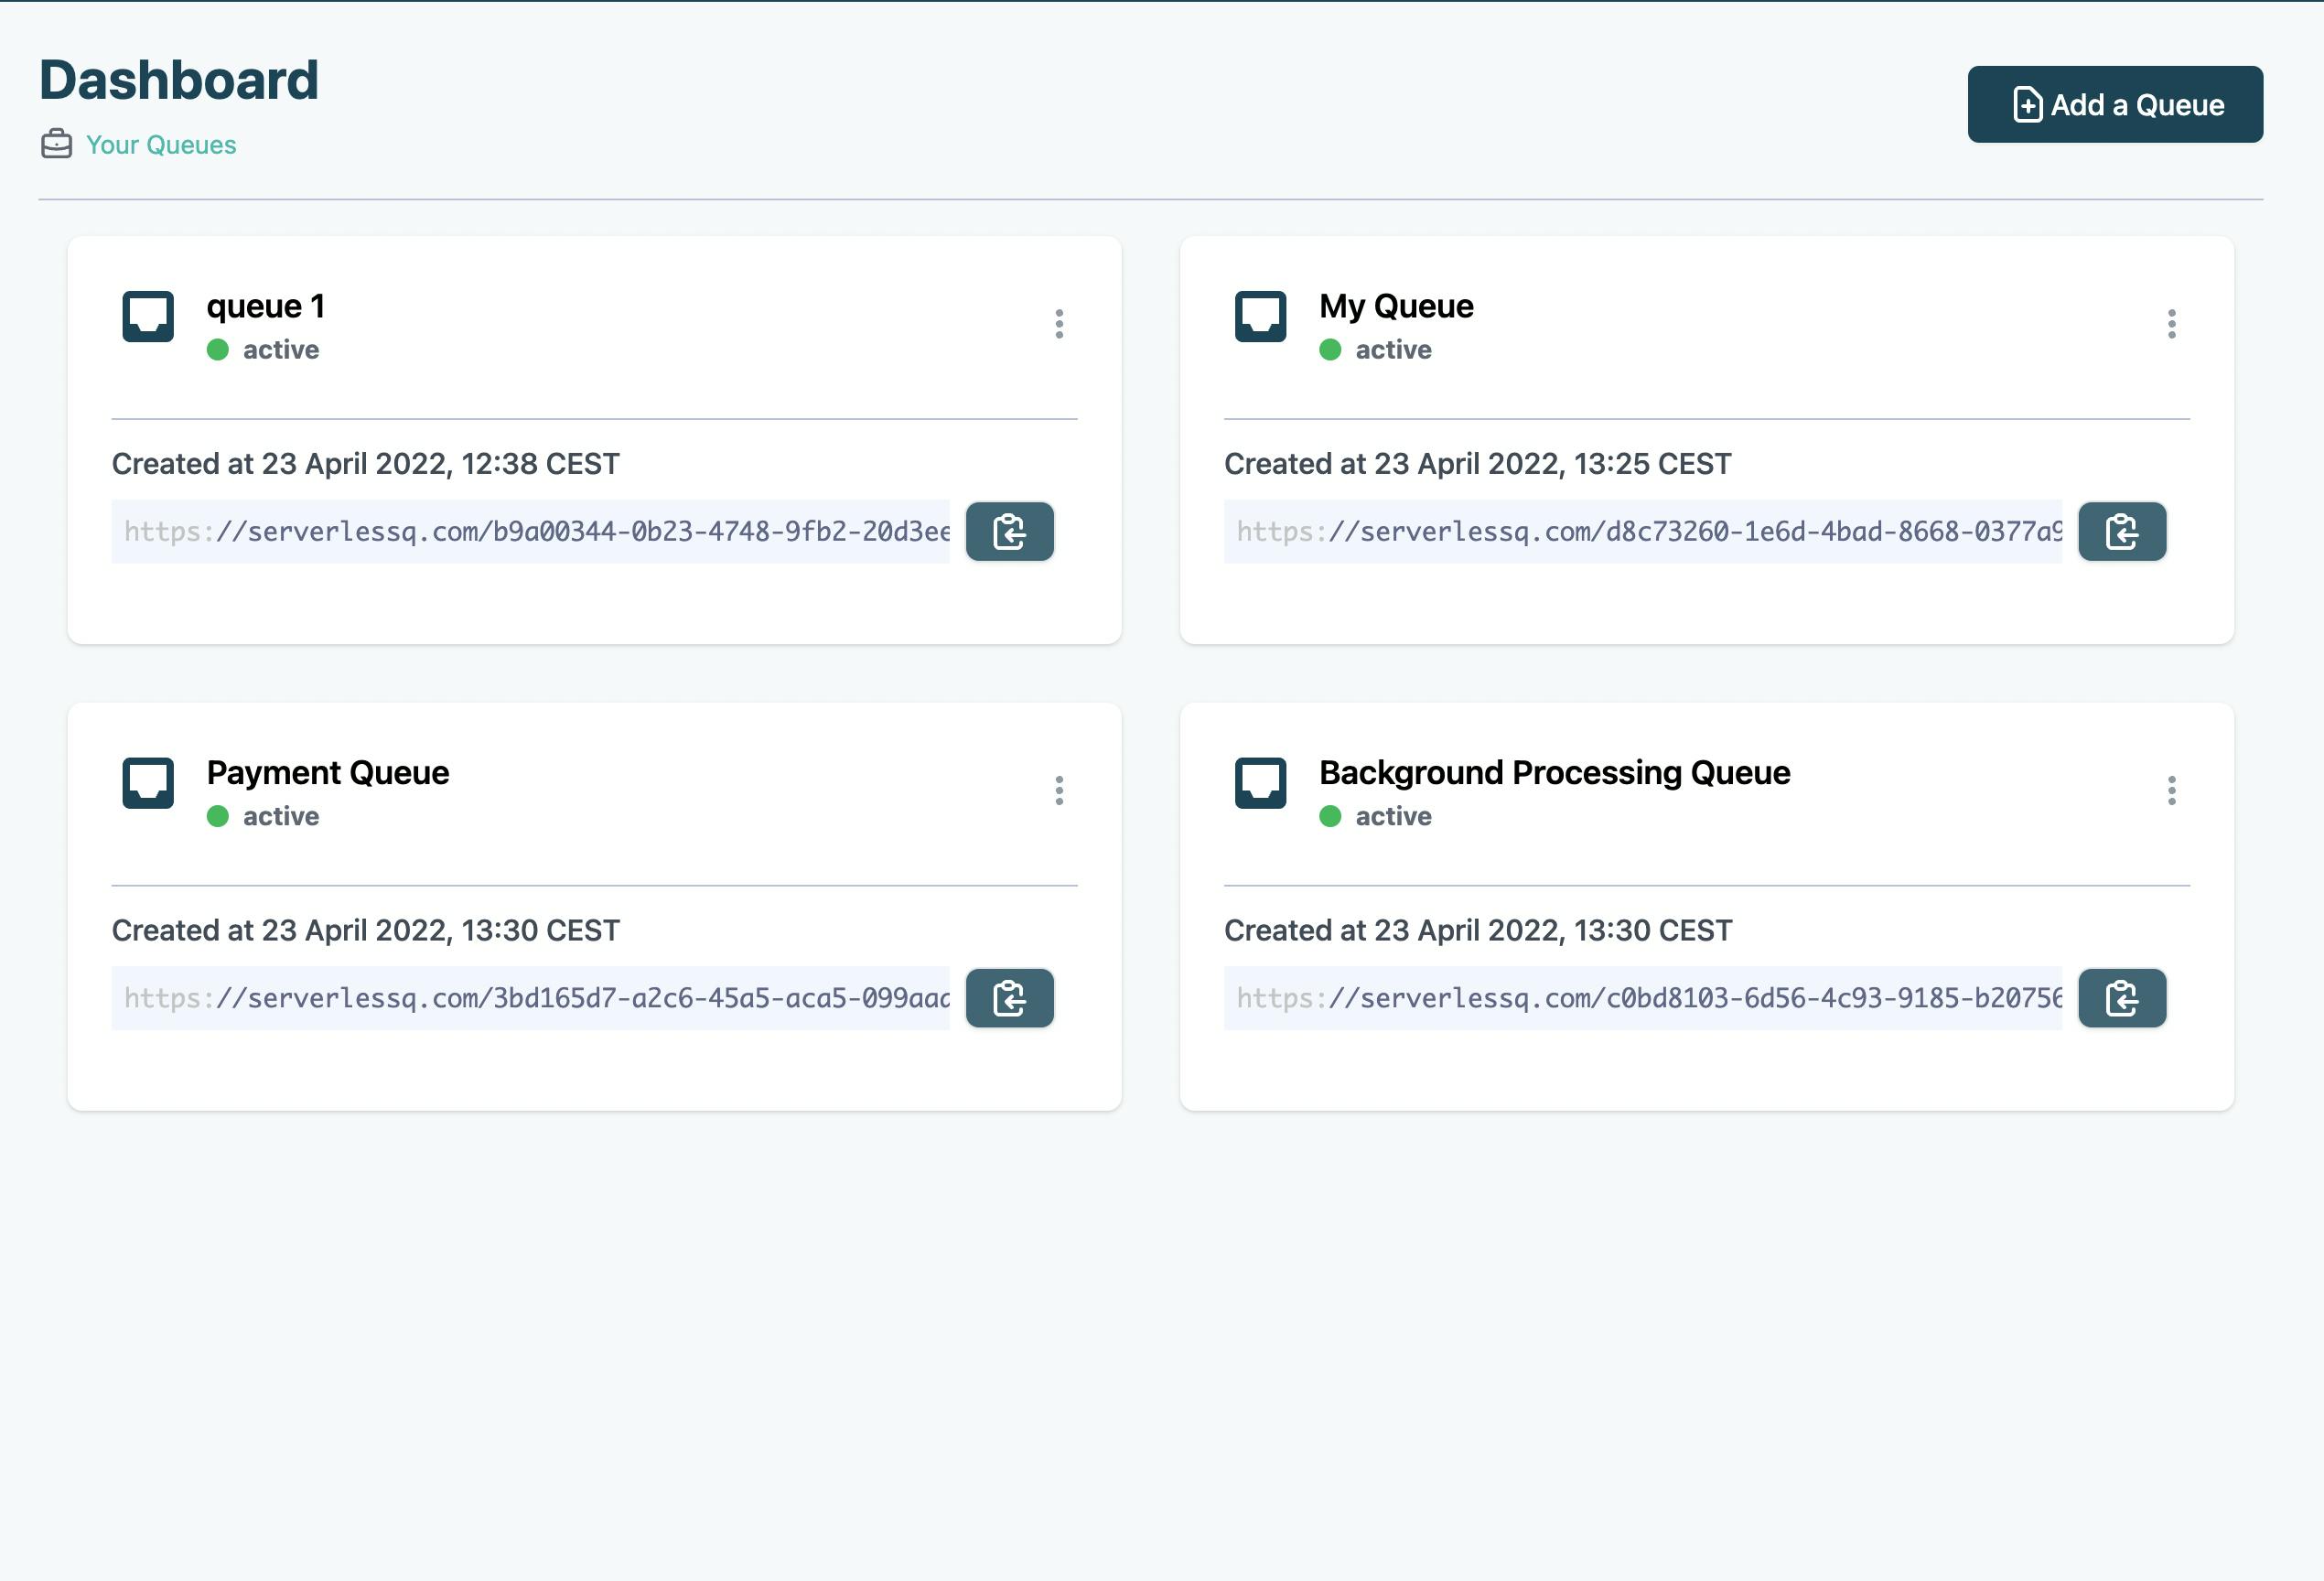
Next to the link, there is a simple copy link to copy the link with the URL straight to your clipboard.
The implementation is pretty straightforward. All queues are saved in DynamoDB with attributes like:
- Name
- Url
- Arn
- User
We've got an index on this tablebyUser. This index has the pk of userId. With that, we're able to query all queues by a user.
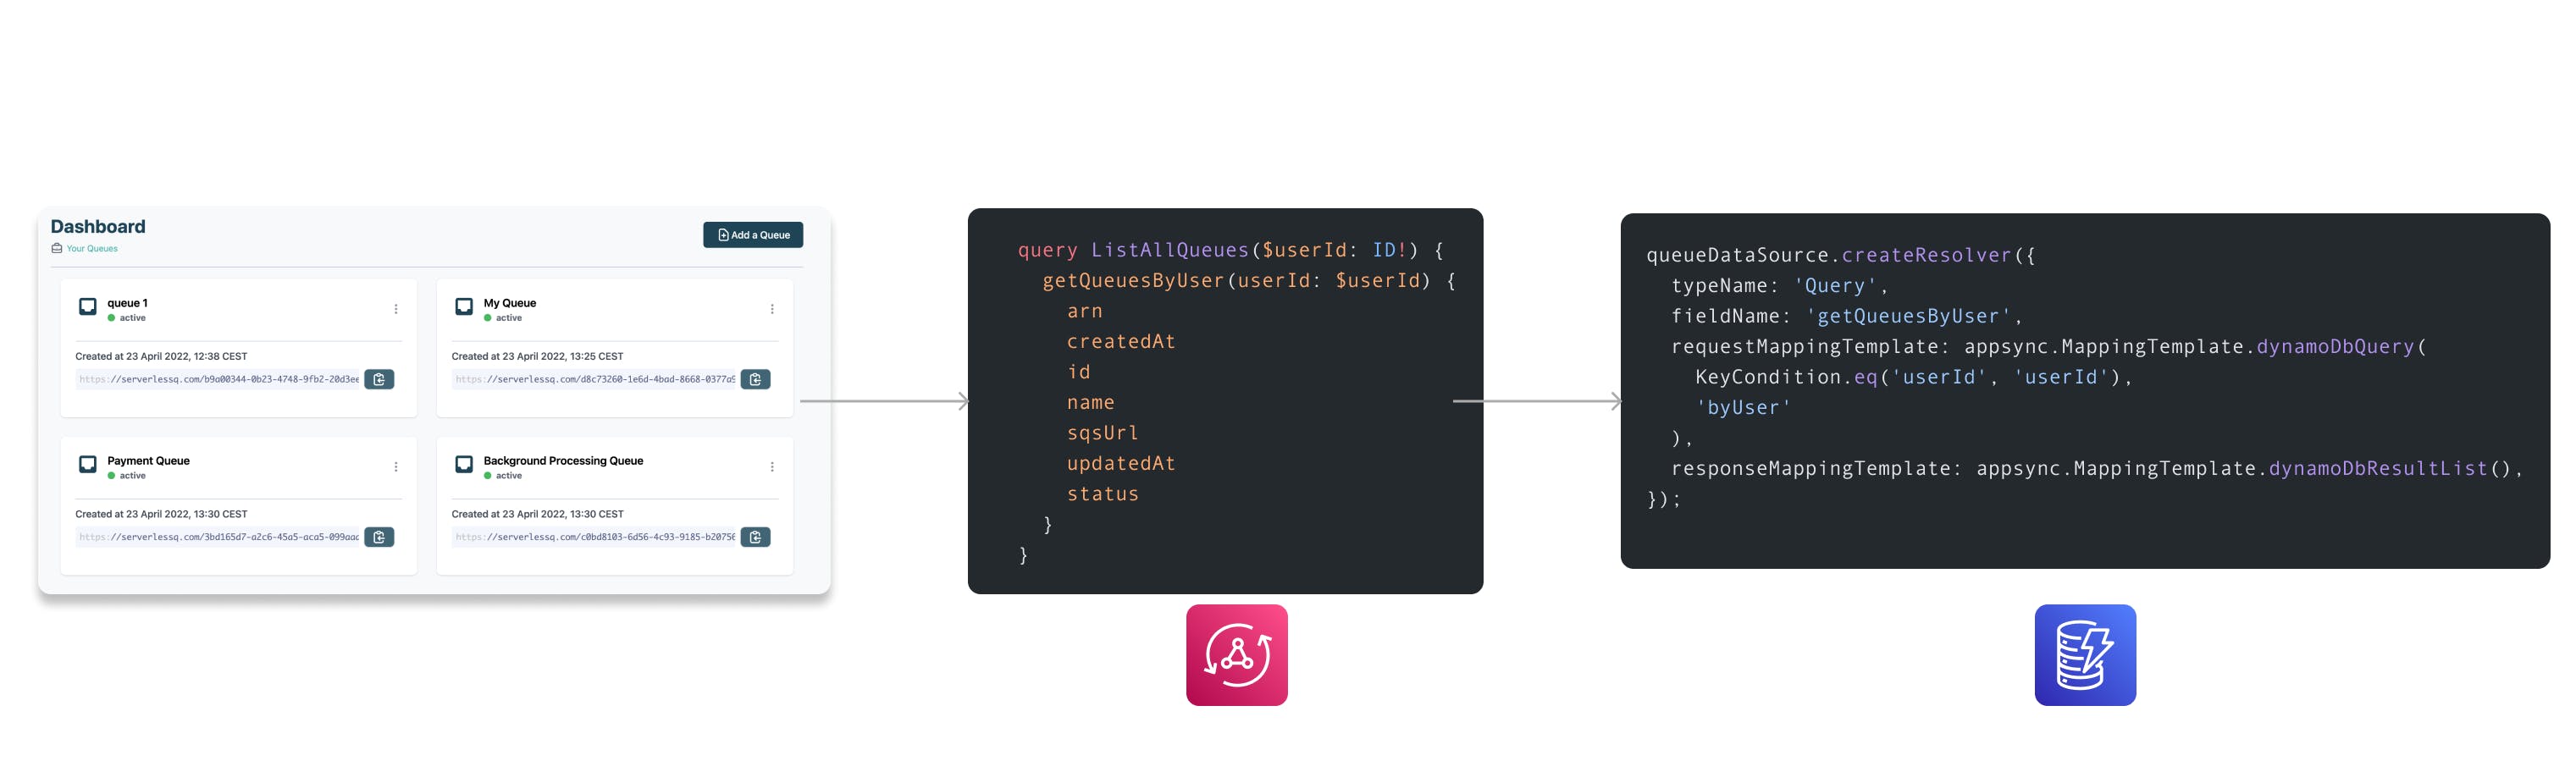
We then go ahead and call the query:
  query ListAllQueues($userId: ID!) {
    getQueuesByUser(userId: $userId) {
      arn
      createdAt
      id
      name
      sqsUrl
      updatedAt
      status
    }
  }
The query will be resolved by VTL resolver:
    queueDataSource.createResolver({
      typeName: 'Query',
      fieldName: 'getQueuesByUser',
      requestMappingTemplate: appsync.MappingTemplate.dynamoDbQuery(
        KeyCondition.eq('userId', 'userId'),
        'byUser'
      ),
      responseMappingTemplate: appsync.MappingTemplate.dynamoDbResultList()
    });
Queue Details
By clicking on one queue, you will see three main things.
- Queue metadata like URL and name
- A pane for sending requests
- Overview of your messages
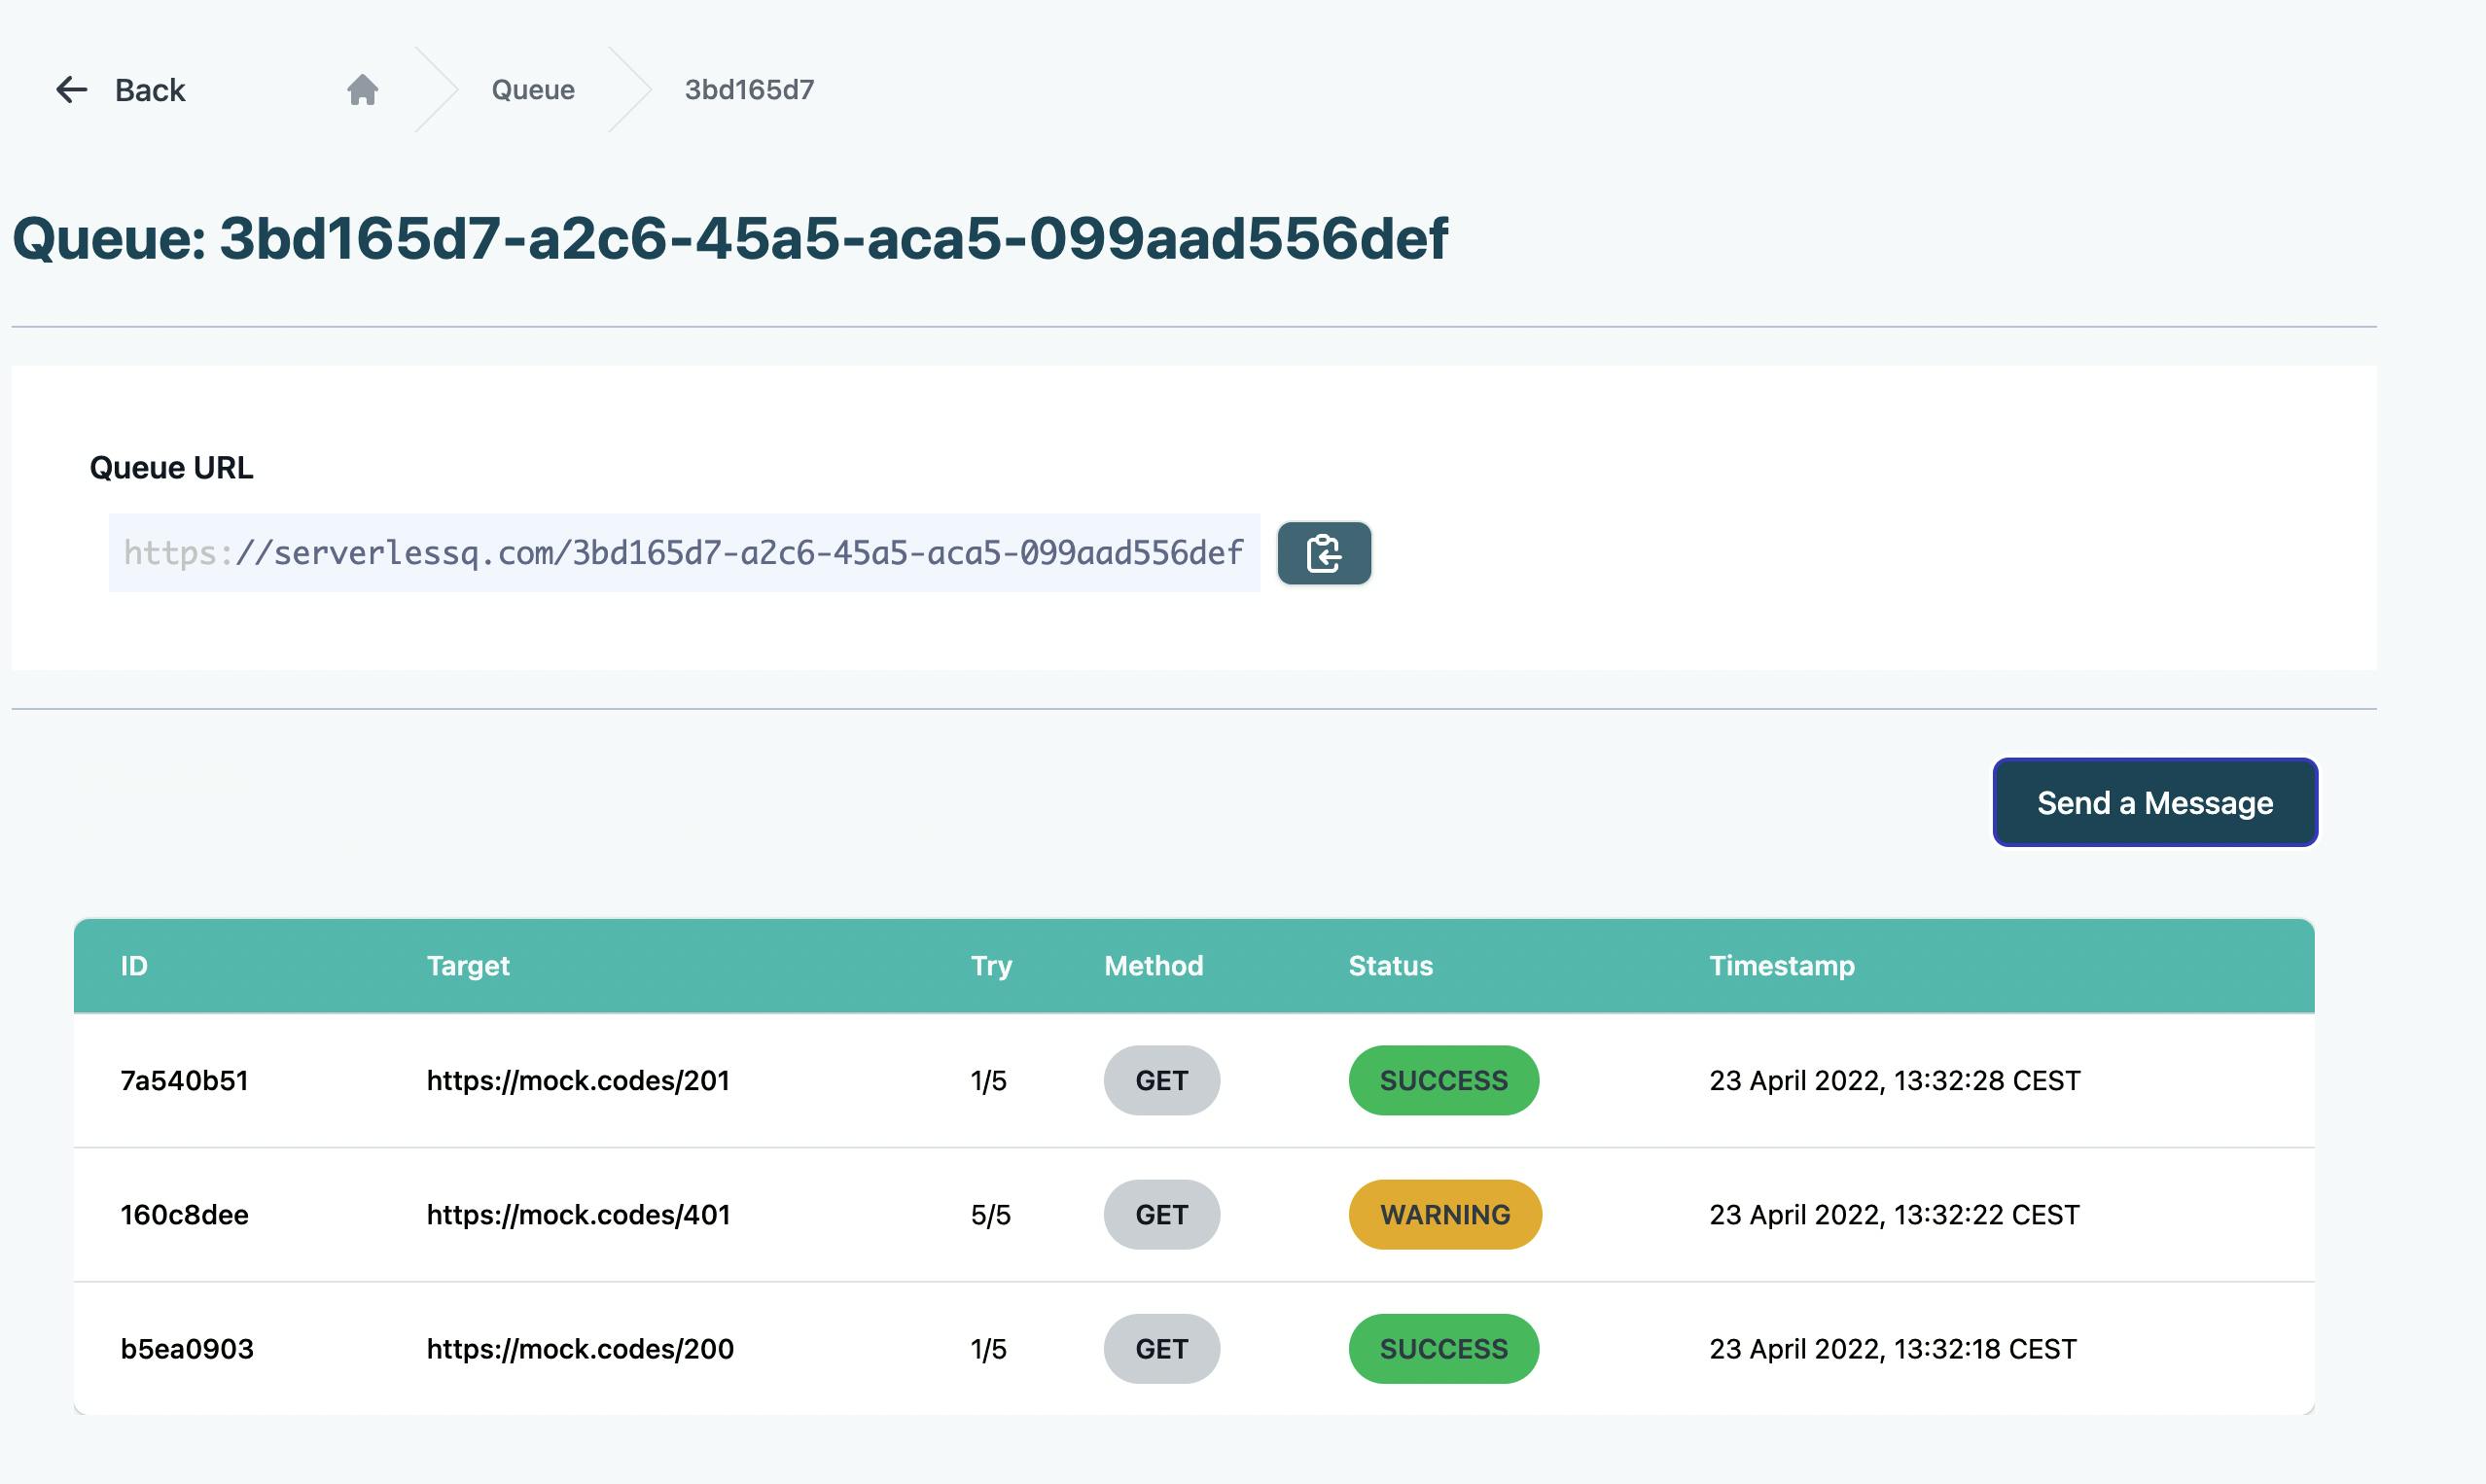
Metadata
The metadata should simply give you some basic information about your queue. For now, it is only the URL. More parameters will be added here in the future like custom parameters (timeouts, retries, delays, etc.).

Sending Requests
In the second pane you see the button Send a Message. This is included to allow users to send a simple message directly from the UI. If you click this button a drawer opens on the right side with a form to send a message.
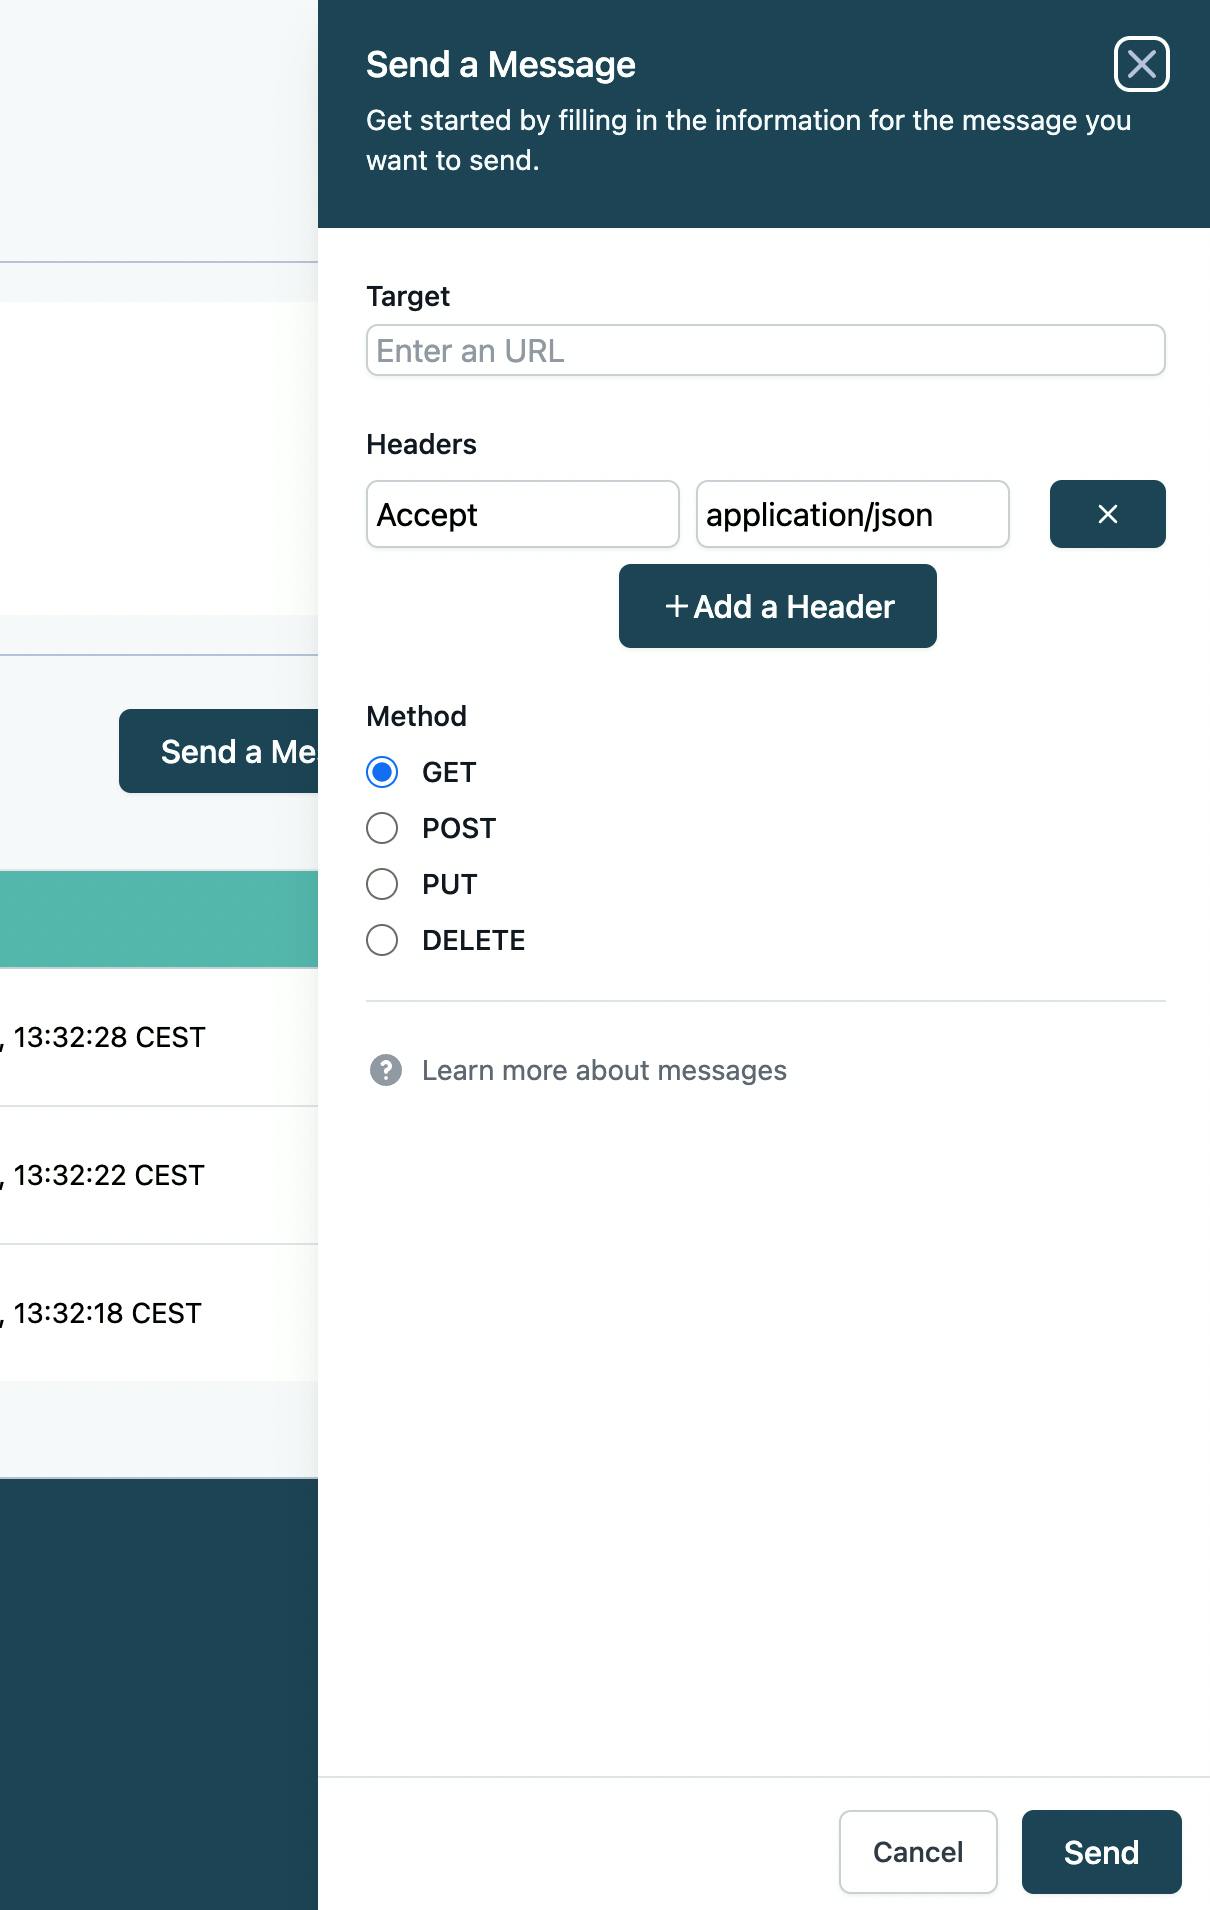
Here we can define a target API (e.g. your Vercel Function), a method (GET, POST, PUT, etc.), custom headers, and a body.
If you hit Send your call will be forwarded to your queue and finally to your target.
You can then see a live update of your messages on the same page. You can see more examples soon. 👇🏽
Overview of your messages
After sending messages you will see your messages in the overview table.

You get a live update of new arriving messages thanks to AppSync subscriptions 🚀
A message has several attributes. Mainly it is a request. A response is attached if the request was successful and no error on the request level happened. For example, if you try calling an API that doesn't exist you won't get a response because there is no server to respond.
Other attributes are:
- ID
- Target
- Retry
- Method
- Status
- Timestamp
All responses (depending on the retries) will be available in the message detail.
For example, if we send a message to the Pokemon API we will see that the request runs through and gives us a status code Success. If we click on the request we see the response with the body of the API. Here we can see all the different details about the Pokemon Ditto.
In contrast, if we send a message and receive an error on the request or response side the queue will retry the message up to a certain threshold. For the MVP this threshold is five but it can be easily customized.
Message Detail
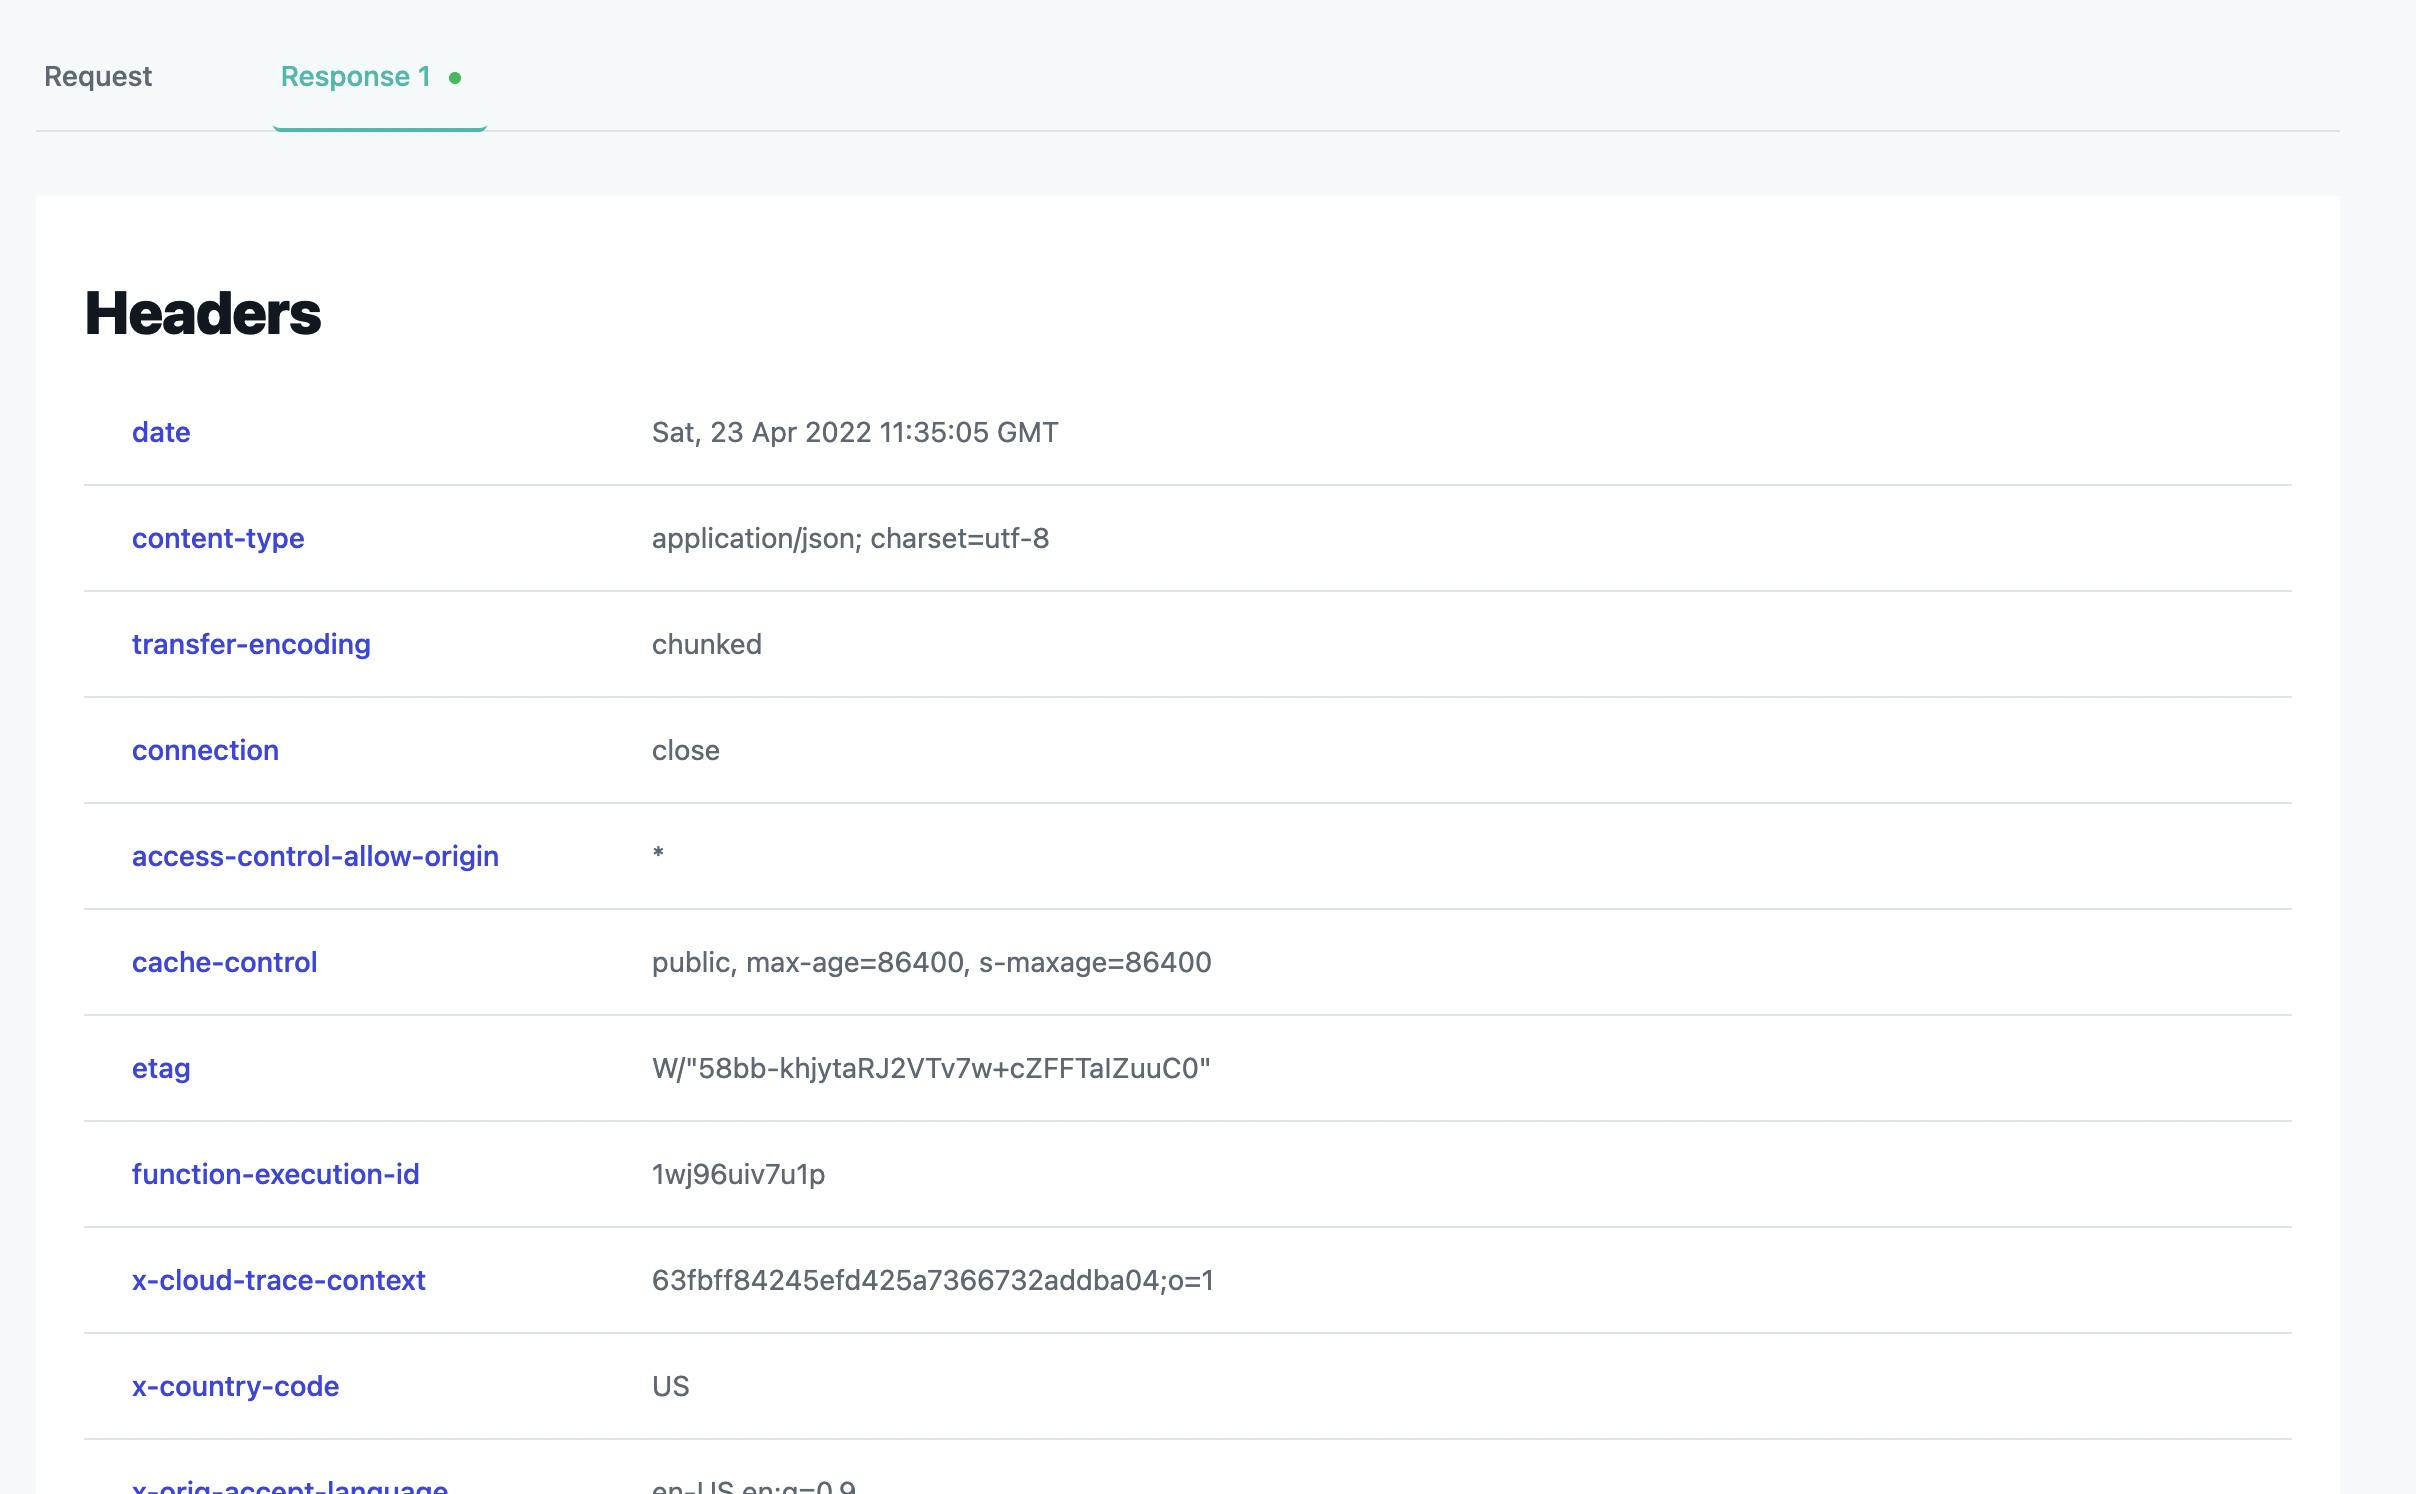
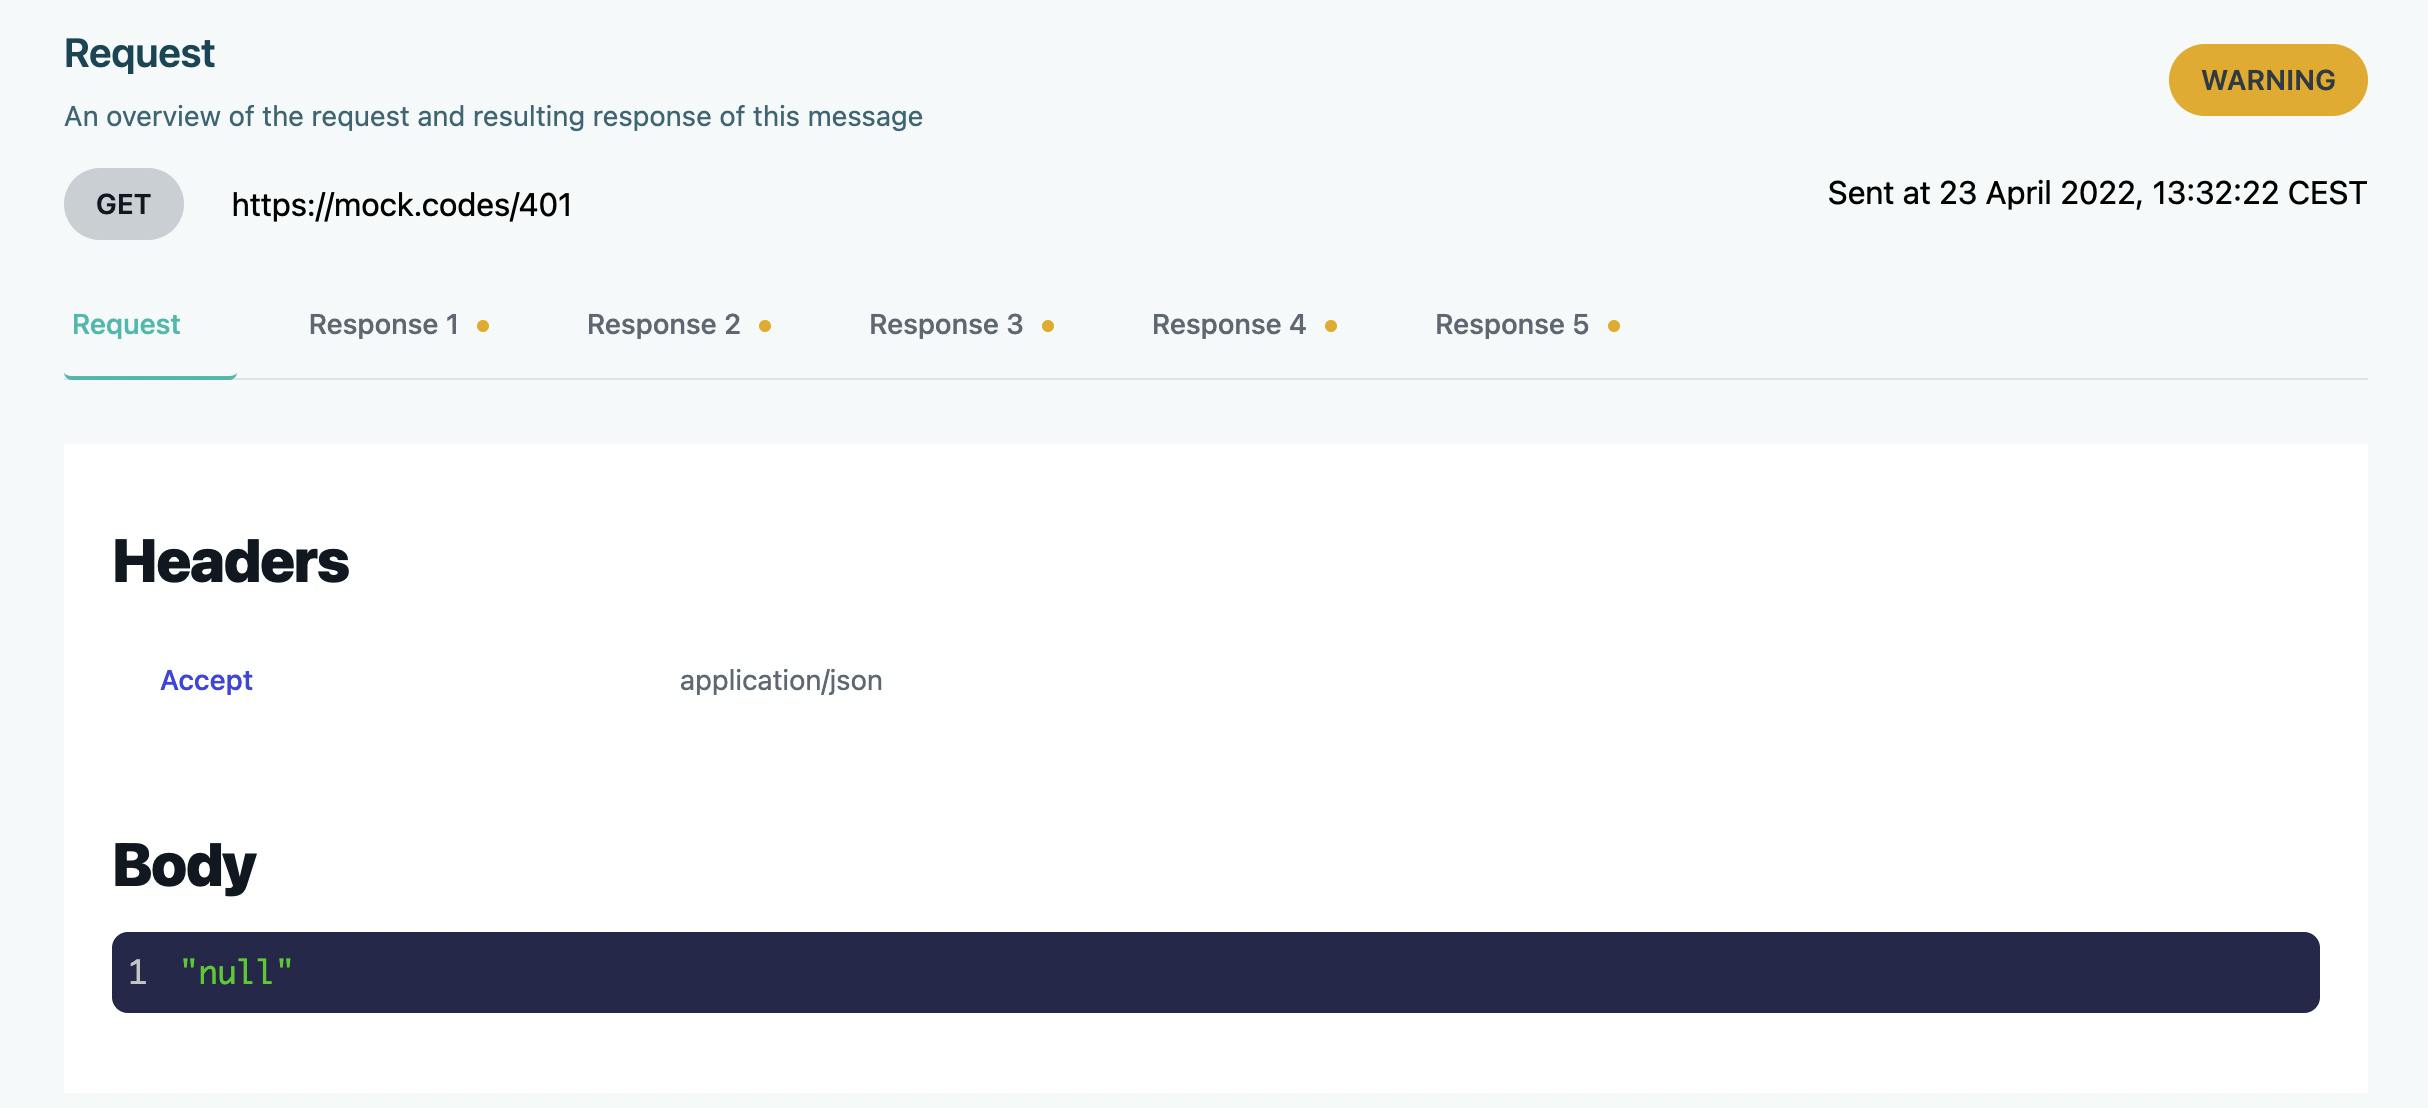
You can also open a message and see the details of that message. The details have the request and the response view. Both contain the following attributes:
- Method
- Target URL
- Timestamp
- Headers
- Body
For example the successful Pokemon API call request
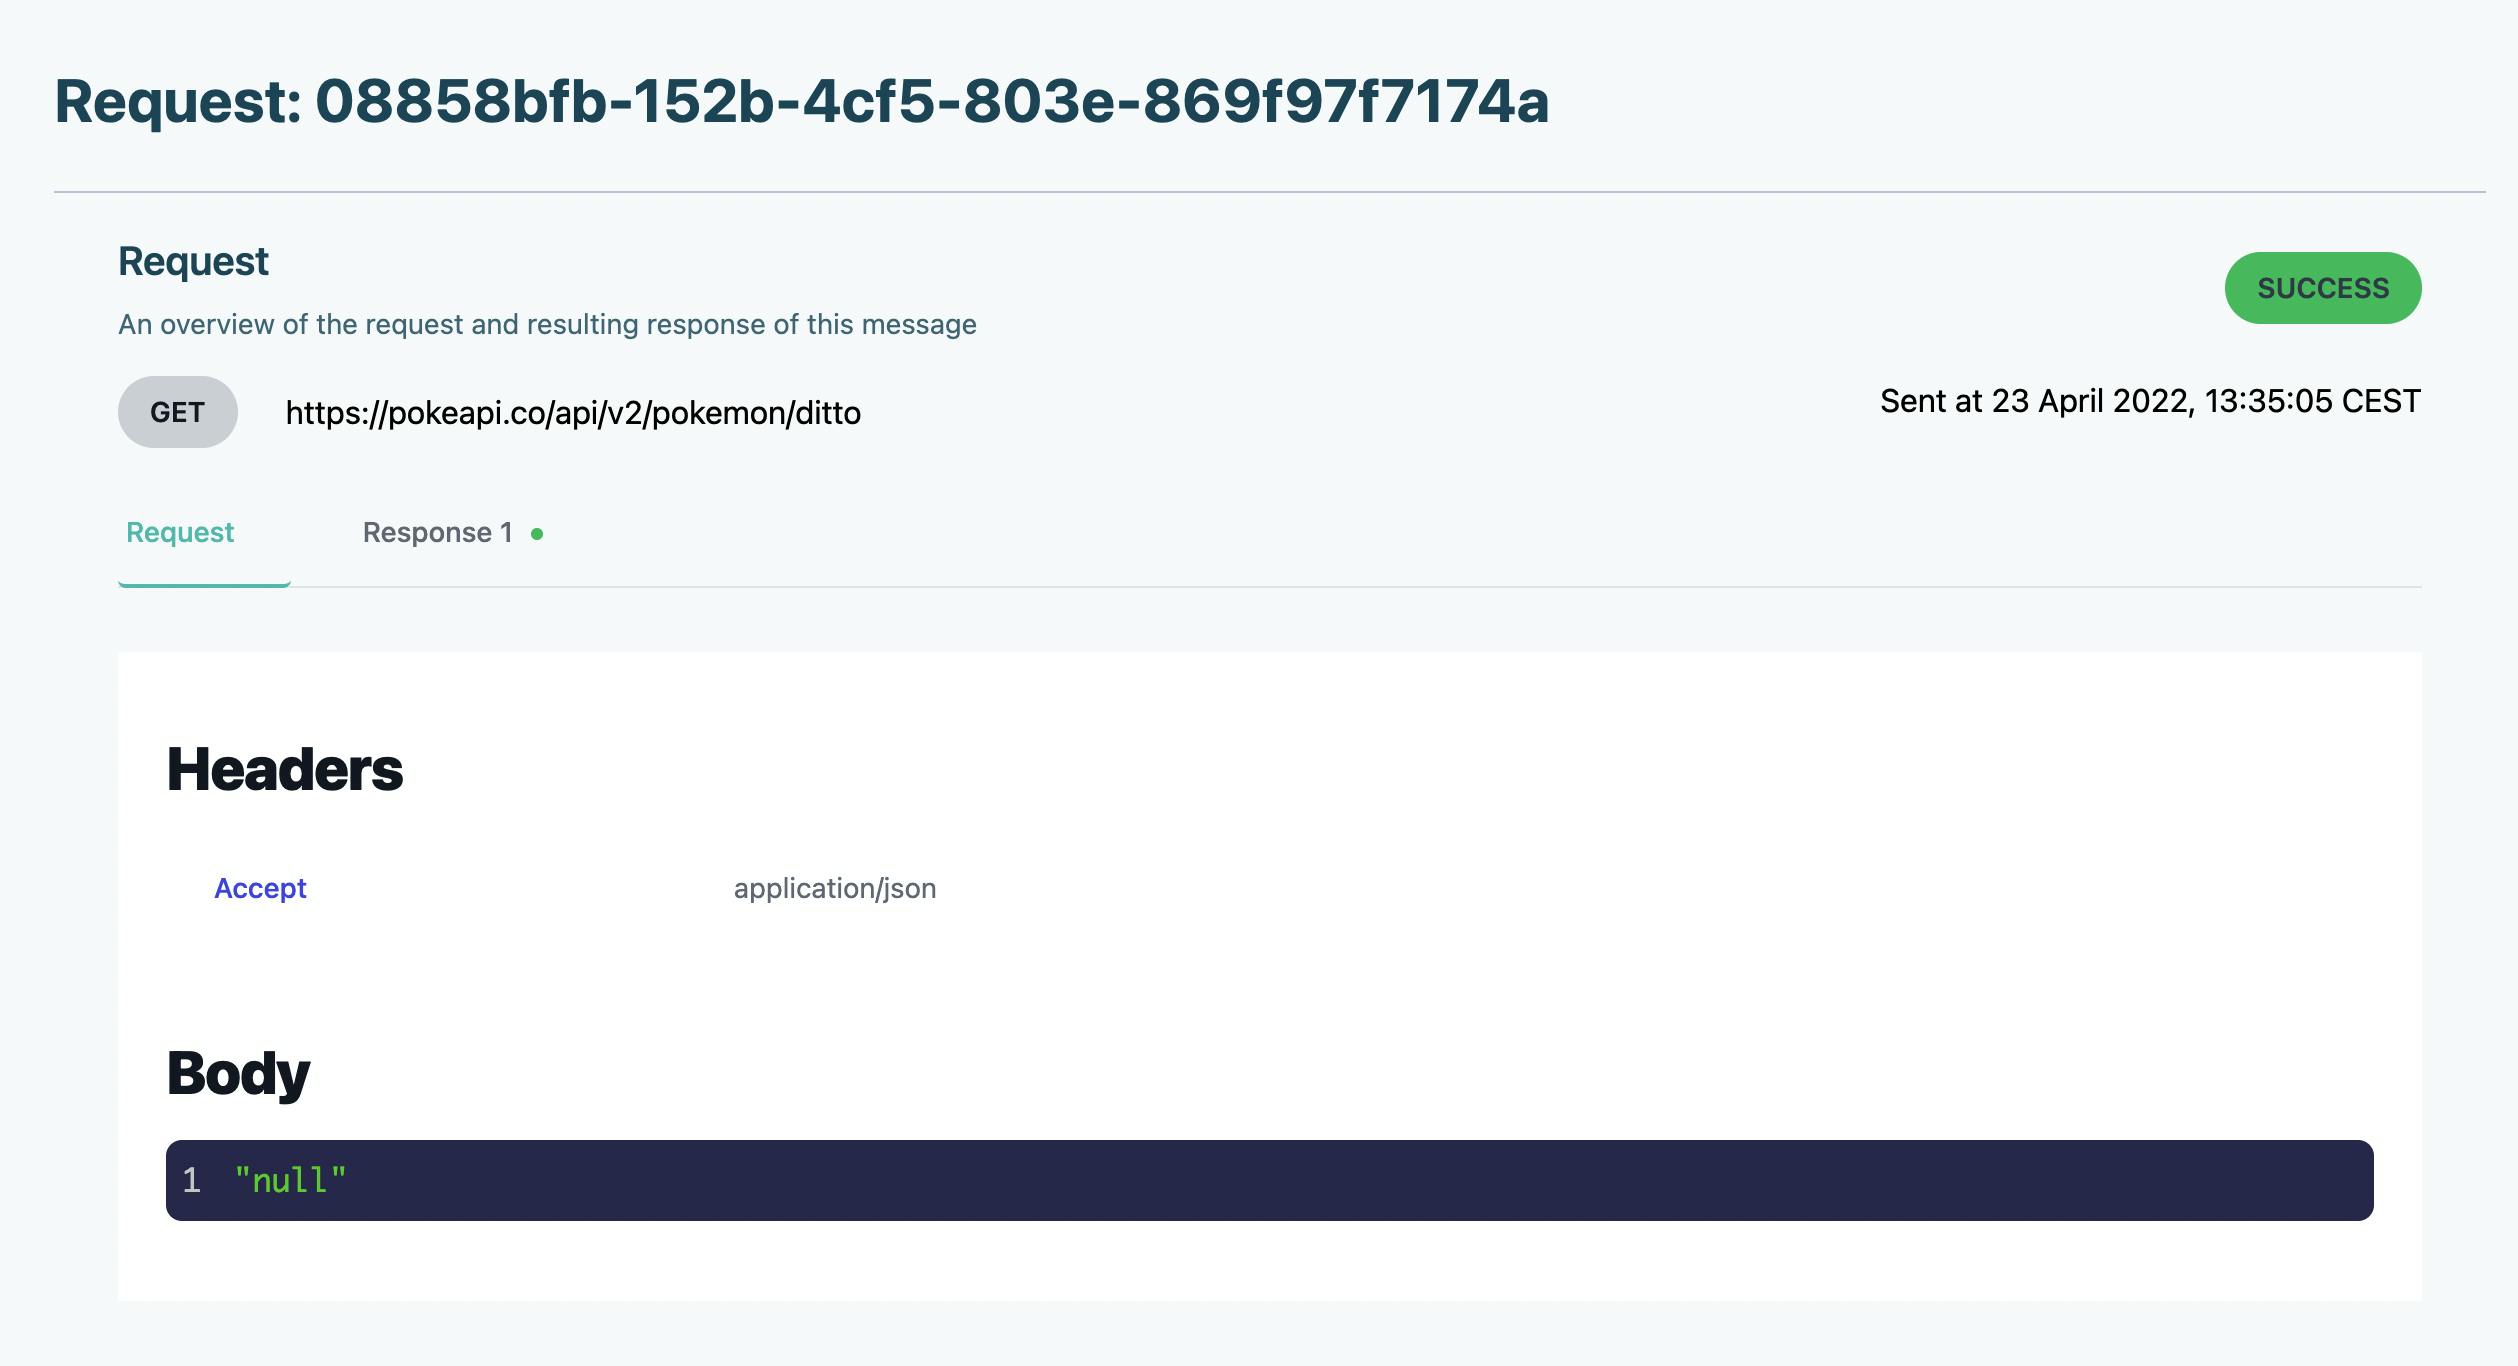
And the response:
Let's see it in a GIF⚡️
For successful responses, we only get one response. In case of retries, we will see several responses.
Let's see it in action
Now I'll show you some more examples in quick videos to get an understanding of what is currently working.
Successful Request to Vercel Function
I've got one application running on Vercel with a mock API. The mock API simply sends a response with the code 200 and a message.
Vercel Function:
As you can see I forward the message and after the first successful try I'll get a proper response
Successful Request with Response Error
Now we will mock response errors.
We need to distinguish between response and request errors.
- Request error: Error on request level, for example, address not found.
- Response error: API returned a faulty response >200
There is a great API out there that simply mocks response error codes. The API is mock.codes. You simply attach a code at the end and this is what the API will return
So if you send a request to mock.codes/200 -> You will get a response code of 200.
But if you send a request to mock.codes/401 -> You will get a response code 401.
All error codes that are not successful (i.e. >200) will be retried automatically five times. This can be customized in the future.
Let's see how that goes.
As you can see the retry process is automatically happening and you see the retries counting up.
Here the retries are pretty fast. This can be customized in the future. We want to offer options like:
- Fixed interval (retry all 5 seconds 10 times)
- Exponential backoff
Unsuccessful Request
The last one is simply a request error where we cannot find the URL.
Here we try to send our request to some API that is not reachable. That is when we show the message AddressDoesntExist. We need to work on the error messages a bit.
We still retry it to have consistent retries on errors.
Next Steps
The next steps are:
Usage Tokens
We need the functionality of using API keys and associating usage plans for each key. The usage plan depends on the subscription the user has.
This will be implemented with:
- API Gateway
- Lambda
Redirection
Currently, all calls are made directly to the API GW Stage URL. We want to use our domain for that of course, so we will forward the domain api.serverlessq.com to our stage URL.
UI
We are not settled on the UI yet. We need to change quite a lot here 🙂
Pricing
Connecting pricing + and usage plans with Stripe.
Summary
That's it! In summary, the functionality of the MVP stands and is possible to execute from the UI. We are super happy with the progress and we see a lot of potential here.
Quite a lot of things still need to implement but it is amazing what you can build on AWS.
If you're interested sign up for our waiting list here. Or DM me if you're interested in joining as a beta user.
I'd love to hear your feedback so let me know what you think 🙂
Thanks for reading!